Hyper Historian Folder
To Create a Hyper Historian Folder:
-
Start the Workbench, then expand your project. Next, expand the Historical Data node to show the Hyper Historian node. Expand the Hyper Historian node to show the Data Collections node.
-
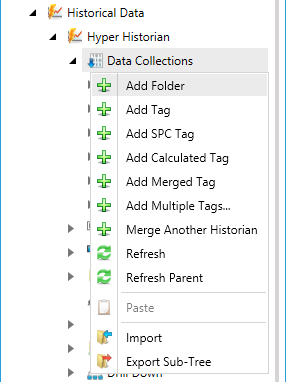
Right-click the Data Collection node in the navigation tree, or any of its sub-nodes, and select Add Folder, as shown in the figure below.
Add Folder from the Project Explorer

-OR-
Select the Data Collections node in the Project Explorer, or any of its sub-nodes, then click on the Add Folder button, shown below, in the Edit section of the Home ribbon in the Workbench.
Add Folder Button

-
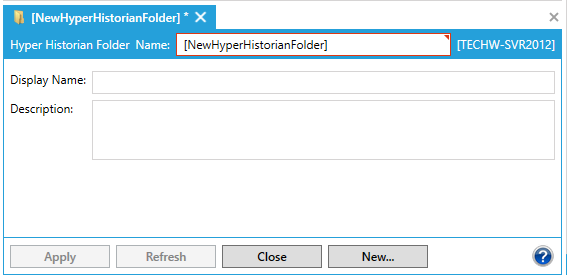
This opens the Hyper Historian Folder properties window, shown below, beneath the Project Details section in the Workbench. Enter a name in the Hyper Historian Folder Name text entry field.
Hyper Historian Folder Properties

-
Display Name - (Optional) Enter the name that will appear in the browse tree of the configurator. This can be longer than the folder name.
-
Description - Enter a description for the folder (optional).
-
Once you have completed setting your folder properties, click on Apply. Your new folder will appear in your selected location in the Project Explorer.
See Also: