Merged Tag
To Create a Merged Tag:
-
Start the Workbench, then expand your project. Next, expand the Historical Data node to show the Hyper Historian node. Expand the Hyper Historian node to show the Data Collections node.
-
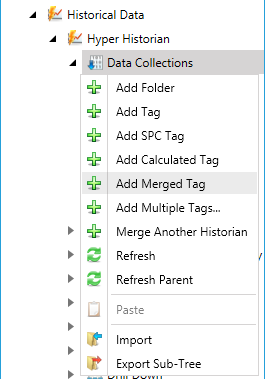
Right-click the Data Collection node in the navigation tree, or any of its sub-nodes, and select Add Merged Tag, as shown in the figure below.
Add Merged Tag from the Project Explorer
-OR-
Select the Data Collections node in the Project Explorer, or any of its sub-nodes, then click on the Add Merged Tag button, shown below, in the Edit section of the Home ribbon in the Workbench.
Add Merged Tag Button

-
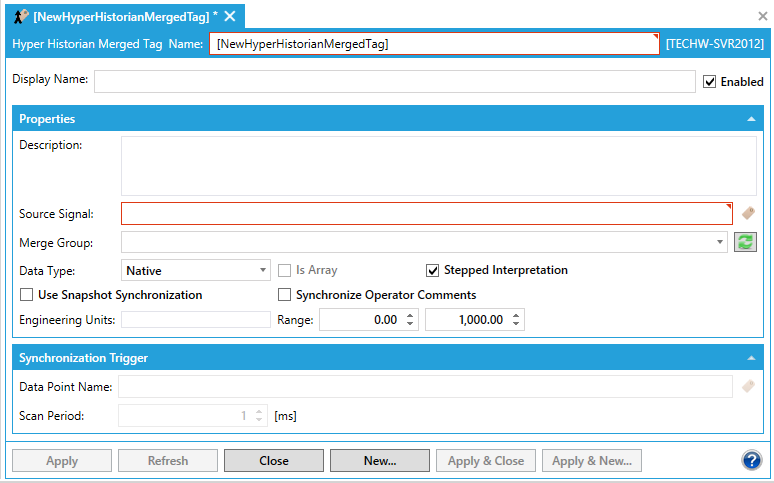
This opens the Hyper Historian Merged Tag properties window, shown below, beneath the Project Details section in the Workbench. Enter a name in the Hyper Historian Merged Tag Name text entry field.
Hyper Historian Merged Tag Properties
-
Display Name - Enter a display name for your Merged Tag in the text entry field
-
Enabled - Click this checkbox to enable this Merged Tag.
Properties
-
Description - Enter a description for this Merged Tag in the text entry field.
-
Source Signal - Enter the location of the source historical tag in the text entry field or click on the
 button to open the Data Browser, allowing you to navigate to your selected historical tag.
 -
Merge Group - Use the pulldown menu to select your preferred Merge Group if at least one has been previously created. Click on the refresh button [
 ] to refresh the list of Merge Groups.
 -
Data Type - Use the pulldown menu to select the data type of the logged value. By using the 'Native' data type, the value will be logged with the data type that the OPC server returns. Values logged as 'Native' cannot be modified via SQL OLE DB interface. Data types include Native, Boolean, Int8, UInt8, Int16, UInt16, Int32, UInt32, Int64, UInt64, Float32, Float64, String, Duration, DateTime.
-
Is Array - Click this checkbox if the Data Type is an array.
-
Stepped Interpretation - Check this checkbox for the nearest older available value to be used as the tag value reading at a given timestamp. Otherwise, the value will be interpreted from neighboring values. This checkbox does not appear for Boolean, String, Duration or DateTime Data Type selections.
-
Use Snapshot Synchronization - Click this checkbox to enable snapshot synchronization. This feature must be enabled on the server side.
-
Synchronize Operator Comments - Click this checkbox to synchronize operator comments from the source historical tag.
-
Engineering Units - Enter a name, in the text entry field, of the engineering units that will be used for the current signal.
-
Range - In the first text entry field, enter the tag's Low limit (or use the up/down buttons). In the second text entry field, enter the tag's High limit (or use the up/down buttons).
Synchronization Trigger
-
Data Point Name - Enter a data point name of the synchronization trigger in the text entry field or click on the ellipsis button [...] to open the Data Browser to navigate to your selected data point. [Note: This step should be taken if Data Change Trigger was selected for the Merge Group.]
-
Scan Period - Enter a scan period of the synchronization trigger (in milliseconds) in the text entry field (or use the up/down buttons).
-
Once you have completed your changes, click on Apply to save your settings.
-
Start Hyper Historian Logging.
-
Create a new TrendWorX64 Viewer display and add two pens:
-
-
One for the Tag from the Source Hyper Historian.
-
One for the Merged Tag from the Target Hyper Historian.
-
-
Go to Runtime and compare the Source and Target Tags.
-
If you change data for the Source Tag that has already been logged:
-
-
It should be automatically forwarded to the Target Hyper Historian if Snapshot Synchronization is enabled.
-
It can be manually forwarded using the Hyper Historian Synchronization Tasks Storage Management:
-
-
Click the “+” button.
-
Specify the Execution Time and Interval.
-
Hit OK and Apply.
-
Check in the TrendWorX64 Viewer that the change was forwarded to the Target Hyper Historian.
-
-
See Also: