Calculated Tag
Calculated tags are always stored in the historical database, can calculate output value from other historical values available within logger instance. New value is calculated whenever trigger event is generated. Calculated tags are calculated on the logger side and as such can be easily re-calculated by either a user request or automatically based on incoming data.
To Create a Calculated Tag:
-
Start the Workbench, then expand your project. Next, expand the Historical Data node to show the Hyper Historian node. Expand the Hyper Historian node to show the Data Collections node.
-
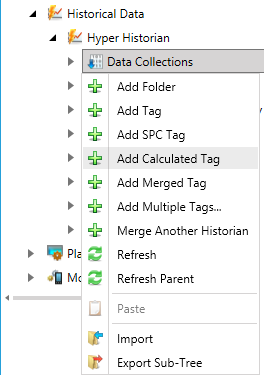
Right-click the Data Collection node in the navigation tree, or any of its sub-nodes, and select Add Calculated Tag, as shown in the figure below.
Add Calculated Tag from the Project Explorer
-OR-
Select the Data Collections node in the Project Explorer, or any of its sub-nodes, then click on the Add Calculated Tag button, shown below, in the Edit section of the Home ribbon in the Workbench.
Add Calculated Tag Button

-
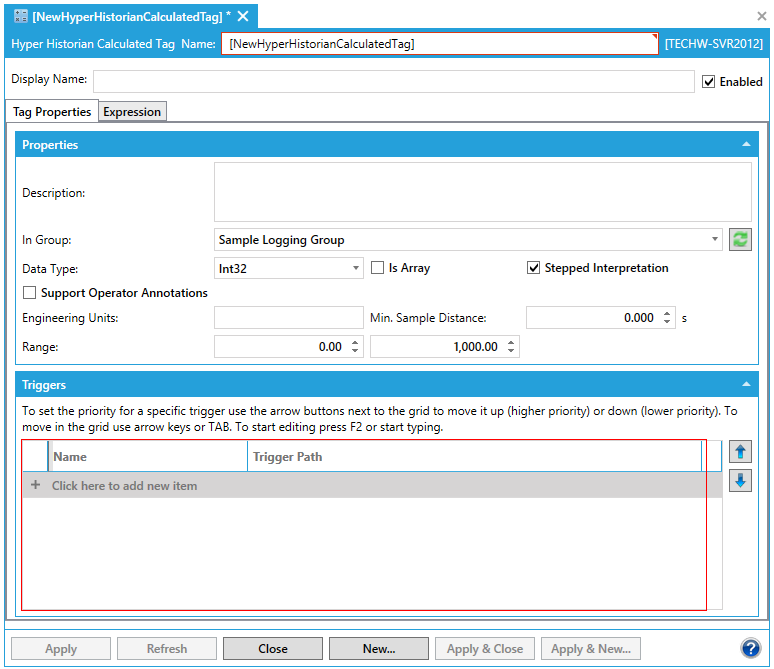
This opens the Hyper Historian Calculated Tag properties window, shown below, beneath the Project Details section in the Workbench. Enter a name in the Hyper Historian Calculated Tag Name text entry field. The name should be short. It is used as a part of the browse name, and for that reason, you want to keep it short. The Display Name field, not the Name field, is where you want to provide lengthy detail so that the Name field is not long. Tags are logged with the browse name that you provided in the Name field, so you want to keep the name short.
Hyper Historian Calculated Tag Properties
-
Optionally, you can enter a Display Name which appears for the calculated tag in the Project Explorer. Use the display name to supplement the shortened tag name that you entered in the Name field. If a Display Name is not provided, the Name appears in the Project Explorer instead.
-
Leave the Enabled checkbox unselected until you are ready to begin using the calculated tag.
Tag Properties
-
Enter a Description that describes how the calculation is used. Include information that will be helpful for later maintenance of the tag. The Description field can contain a detailed description of several lines for the calculated tag. Use the description for a complete definition of the calculated tag.
-
Select the data type from the Data Type drop-down menu. Among the options available to you are: Native, Boolean, Int8, UInt8, Int16, UInt16, Int32, UInt32, Int64, UInt64, Float32, Float64, String, Duration, DateTime.
-
Put a checkmark next to Is Arrayif the data type selection is an array.
-
Put a checkmark next to Stepped Interpretation to enable this feature if it is desired. The Stepped Interpretation checkbox is used primarily during playback, for interpreting the tag’s data values. This feature is applied only if you request a value for a certain point of time. The returned value will be the nearest older value available. In general, if the data comes from a discrete signal such as an on/off switch (or a Boolean data type), put a check mark in this box; but if data comes from a sine wave or analog signal, leave the box empty.
-
You can optionally put a check mark in the Support Operator Annotations check box to allow operators to comment on the signal in displays. Later, as the tag’s data values play or replay in the Trend Viewer, you may want to be able annotate the tag’s data values as you see them trending before you. For example, maybe you want to note an operator action that altered the data slightly, or highlight a piece of data for analysis later. Putting a check mark in the Support Operator Annotations check box lets you do that. Such annotations are saved with the tag’s data in its logger file, which makes the annotations available in a replay, accessible to the Hyper Historian SQL Server Interface, and archived with the tag’s data.
-
Enter the Engineering Units that will be used for the current tag.
-
In the Min. Sample Distance text entry field, specify the time distance, in seconds and milliseconds, between calculated samples. This option is helpful for limiting samples from high-frequency sampling.
-
Enter the Ranges for the Low Limit and High Limit. The high and low limits are used by the filter algorithms.
-
In the Triggers section, add the triggers that determine when the calculations will occur. The triggers that you can add here are calculation triggers that must be predefined as described in the Creating a Calculation Trigger topic. Note that you can use the Up and Down buttons (on the right) to sequence triggers in the list. The sequence becomes important only when two triggers execute at the same time; the trigger that is higher in the list will execute first.
Expression
-
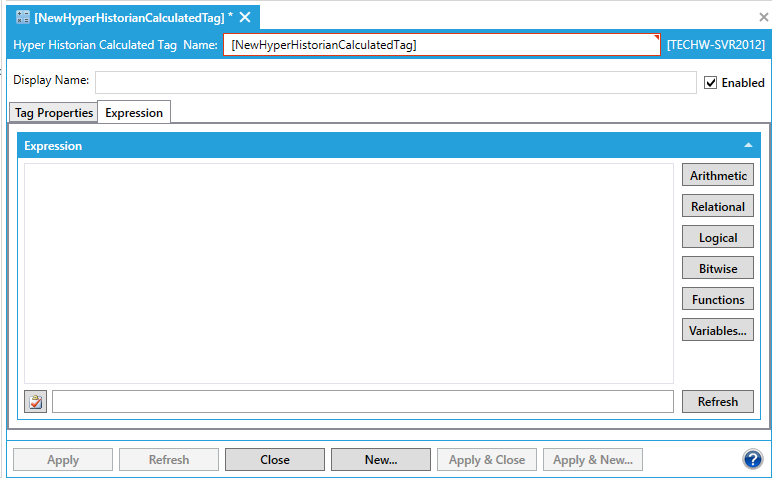
Go to the Expression tab to create an expression for the calculation. This expression should include the following:
-
The tag or tags whose data is to be used as input to the calculation. This can include values from Hyper Historian tags and signals as well as values from other calculated tags. Clicking the Variables button will open a dialog box that lets you choose any tag that is in the Hyper Historian tree in Project Explorer.
-
The historical time frame from which data is to be taken. The time frame should be relative to the execution date and time determined by the triggers. Do not hard code dates into the expression unless you always want those exact dates to be used for the calculation.
-
Any additional selection criteria to be used.
-
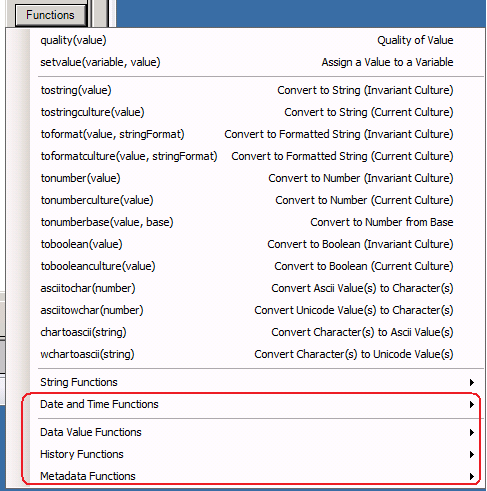
The calculation to be performed. Click the Arithmetic, Relational, Logical, Bitwise, and Functions buttons to incorporate syntactically correct elements into the calculation. Note that, from the Functions button, there are a number of
 functions
that are specific to calculated tag logic; you can learn more
about them by going to the Performance
Calculation Functions topic. For tips on writing an expression
and for all other elements that are available to you, refer to
the Expression Editor
topic.
functions
that are specific to calculated tag logic; you can learn more
about them by going to the Performance
Calculation Functions topic. For tips on writing an expression
and for all other elements that are available to you, refer to
the Expression Editor
topic.
-
Calculated Tag - Expression Tab
-
Click the Syntax button
 at the
bottom of the window to check the logical syntax of the expression.
Make any necessary corrections.
at the
bottom of the window to check the logical syntax of the expression.
Make any necessary corrections. -
When you are satisfied with the calculation, make sure you put a check mark in the Enabled check box.
-
Click Apply when you are done.
-
At this point you can test the calculated tag to make sure the expression is calculating the result you are looking for.
See Also: