Remove a Symptom
To Remove Symptoms
-
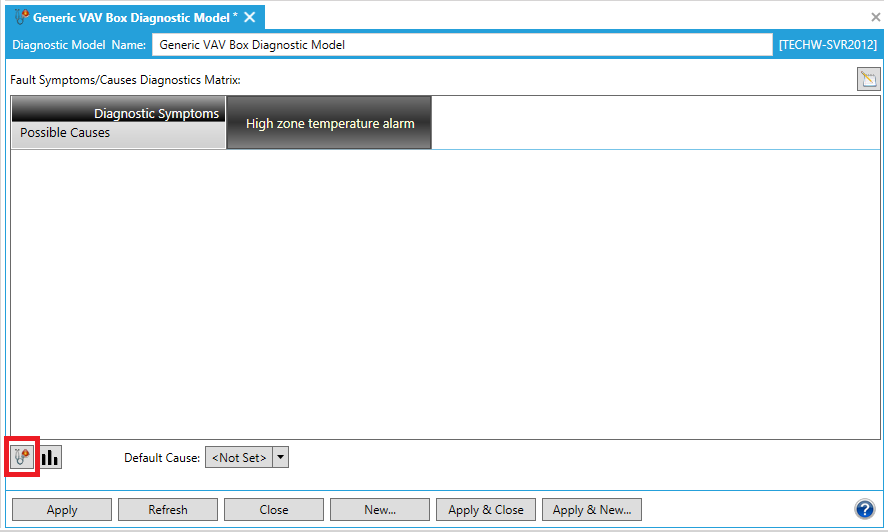
To remove symptoms from the Fault Symptoms/Causes Diagnostics Matrix, click on the Add, Remove or Edit Diagnostic Model Symptoms button [
 ] at the bottom left of the window, highlighted in the image below. NOTE: You can also click on the
  button in order to open a larger Diagnostic Matrix Editor window, which functions similarly but provides additional room for the addition of symptoms and causes.
Removing Symptoms from the Fault Symptoms/Causes Diagnostic Model

-
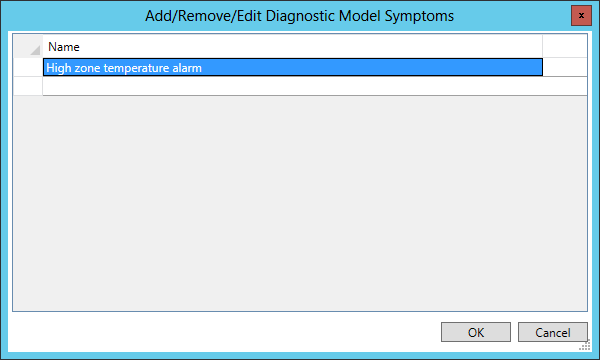
The following "Add, Remove or Edit Symptoms" window will appear. Your existing symptom(s) will appear under the "Click here to add new item" selection at the top of the screen.
Removing a Symptom

-
In order to remove a symptom, you must first select it, as shown below, then press the Delete key. For instructions on renaming a symptom, view Edit a Symptom. Be sure that you have selected the entire symptom (the entire row of cells) for deletion rather than just deleting the symptom name. You'll be able to tell by whether the row of cells remains after clicking on the "Delete" key or not.
Highlighting a Symptom Prior to Deletion

-
Once you have completed the deletion of the selected symptom(s), click "OK" to proceed. You will return to the Fault Symptoms/Causes Diagnostics Matrix. You'll see that your selected Symptom(s) has/have been removed from the top row of the Matrix.
-
In order to save the changed status of the Fault Symptoms/Causes Diagnostics Matrix (with the newly removed symptom[s]), you must then either click on the "Apply" button at the bottom of the Diagnostic Model panel (and can then proceed to make additional changes to the same Diagnostic Model)ORclick on "Apply & Close" to save your settings and return to the main Project ExplorerORclick on "Refresh" to update the Matrix itselfOR click on "Reset" to return the state of the Matrix to the last saved settingsORclick on "Add New..." to change the settings for an additional new Diagnostic Model.
See Also