General Settings and Subscriptions
To Set General Settings and Subscriptions for Alarms and Events Settings in the Assets Node in the Workbench:
-
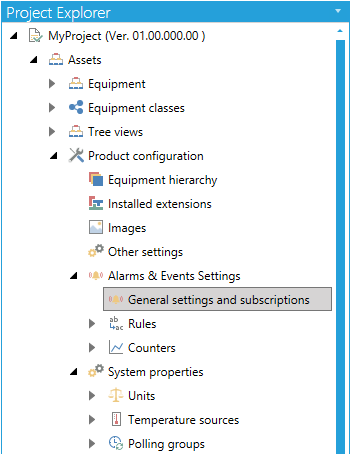
Open the Workbench and expand your project then the Assets node, then the Product configuration node, then the Alarms & Events Settings node, shown below.
General settings and subscriptions Node Selected in the Project Explorer in the Workbench
-
Double-click on the General settings and subscriptions node. The General settings and subscriptions properties will open in the Project Details section of the Workbench as shown below.
General settings and subscriptions Properties in the Workbench
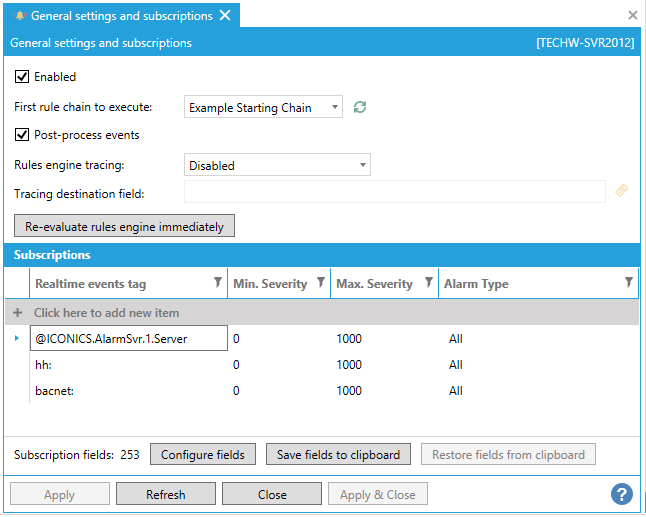
General settings and subscriptions
-
Enabled - Simply enables or disables alarm processing.
-
First rule chain to execute - Use the pulldown menu to select the Alarms/Events notifications coming into AssetWorX to execute in this chain. The listed items are populated from the set Rules (Rule Chains). The default list upon first installation includes: Assignment by Alarm Area; Assignment for BAC generated alarms; Assignment for BACnet alarms; Assignment for Historian alarms; Example Starting Chain [default]; Handing unassigned alarms and events; and Set Property or Equipment point name. You can also choose to "clear value" and/or use the
 button to refresh the list.
 -
Post-process events - When checked, all Alarms/Events notifications are post-processed after exiting the Rules Engine. Post-processing replaces any relative references and event fields found inside << >> on all text (String) fields. This makes it possible to define them in the alarm source (in AlarmWorX64 Server, for example) and then have them be replaced by AssetWorX.
-
Modify SourceName to start with Equipment or Property point name - When enabled, the SourceName field of alarms subscribed via AssetWorX is modified to include the equipment or property name. See HERE for more details.
-
Rules engine tracing and Tracing destination field - As Alarm/Events notifications pass through the Rules Engine, the Rules Engine generates messages both for normal operation and errors. Use the pulldown menu to select from Disabled, Errors or All. Normal operations are traced in TraceWorX on the All level, errors on the Debug level. Additionally to TraceWorX, these two settings can add the messages to a selected field on the Alarm/Events notification directly. The destination field must be a virtual field on the subscription.
-
Re-evaluate rules engine immediately - When making modifications to the Rules Engine configuration or to the address space in AssetWorX, those changes will not get applied to Alarms/Events notifications that already went through the system. This button makes all the cached condition notifications go through the Rules Engine again so that it can pick up any changes.
Subscriptions
-
Click on + Click here to add new item to add a new Realtime events tag. You can enter the tag name directly in the text entry field in the Realtime events tag column or click on the
 button to open the Data Browser and navigate
to your selected tag.
button to open the Data Browser and navigate
to your selected tag. -
Next, you can enter a Min. Severity, Max. Severity and Alarm Type. The Alarm Type pulldown allows you to select from None, Simple, Tracking, Condition, Simple & Tracking, Simple & Condition, Tracking & Condition, or All.
-
Configure fields - Clicking this button opens the Add/Remove fields from the subscription window, shown below.
Add/Remove fields from the subscription Window - Server Fields Tab
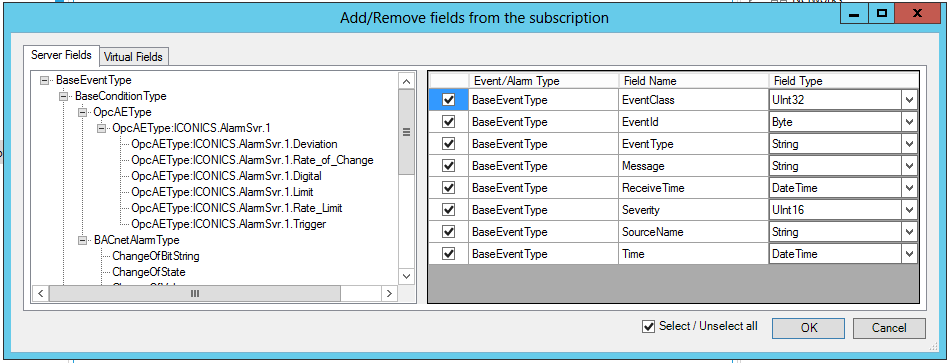
Server Fields Tab
-
In the left side of the window, expand the selections to select from the BaseEventTypes. When a BaseEventType is selected, you'll be able to see the associated Event/Alarm Types, Field Names, and Field Types. Click the checkbox to the right of each field that you would like to include in the subscription. You also have the option to Select/Unselect all (via separate checkbox in the bottom right of the window).
-
Click on OK to accept your changes and return to the General settings and subscriptions properties. Your selected fields will now appear in the Subscription section.
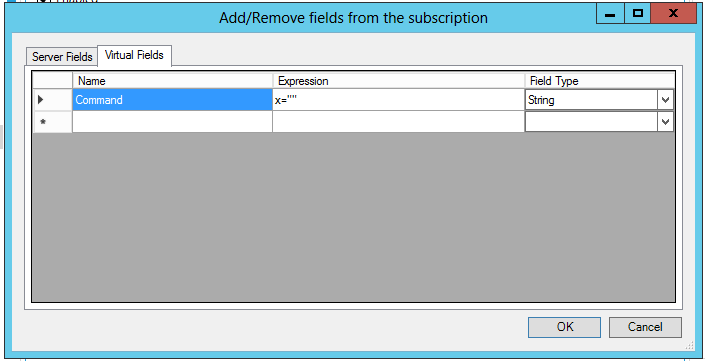
Virtual Fields Tab
Virtual Fields Tab of the Add/Remove fields from the subscription Window
-
-
Name - Enter a name for the field to be used in the Subscription.
-
Expression - Enter an expression in the text entry field or click on the ellipsis button [...] to open the Expression Editor to build your expression.
-
-
Field Type- Use the pulldown menu to select from Boolean, Byte, Char, DateTime, Decimal, Double, Guid, Int16, In32, Int64, SByte, Single, StatusCode, String, TypeInfo, UInt16, UInt32, UInt64, or Object.
-
-
Click on OK to accept your changes and return to the General settings and subscriptions properties. Your selected fields will now appear in the Subscription section.
-
-
Save fields to clipboard - Copy the listed fields to the local machine's memory for later retrieval.
-
Restore fields from clipboard - Restore any saved fields to the Subscriptions section of the currently opened General settings and subscriptions properties.
-
Once you have finished making changes, click Apply and Close to save your settings and return to the Workbench.
See Also: