Quick Start
Process Automation Template Version1
Create Instances
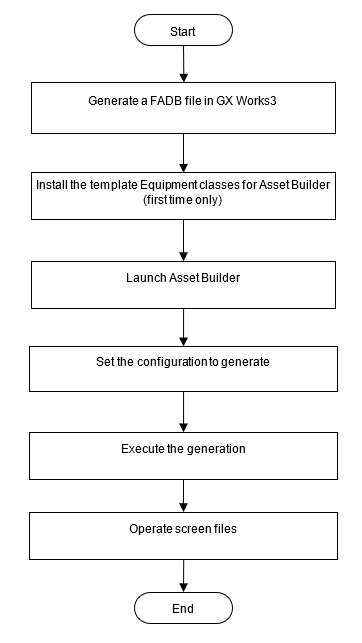
The Quick Start provides basic instructions for using Asset Builder when using Process Automation Template Version1. The following figure shows the flow of the basic operation procedure.
Basic Operation Procedure Flow
Generate an FADB file in GX Works3
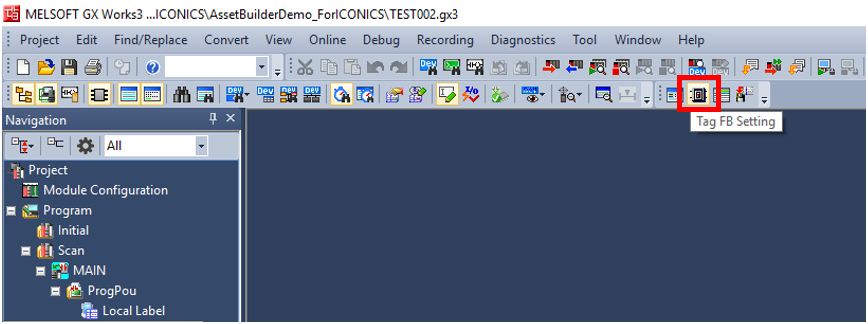
1. Open the GX Works3 project (. gx3) with the Process Automation “Tag FB settings” button as defined.
2. Click on the “Tag FB Setting” button.
The “Tag FB setting” button in GX Works3
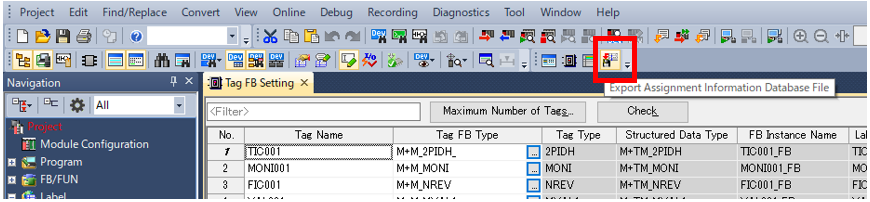
3. Click on the “Export Assignment Information Database File” button.
The “FADB File Export” button in GX Works3
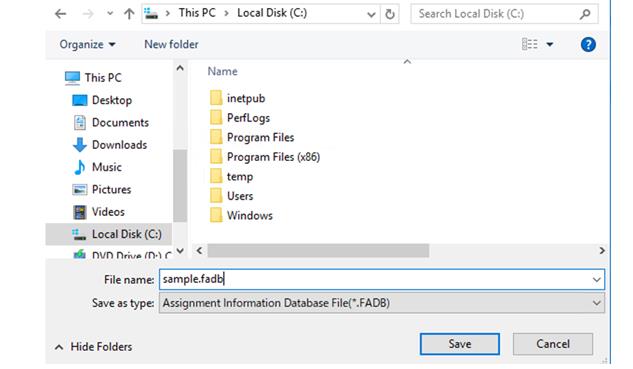
4. Save the FADB file to a desired folder.
File Save Dialog
Installing the “Equipment classes” template for Asset Builder (only when doing it for the first time)
This procedure has to be executed only when Asset Builder (for each Assets setup database) is used for the first time. If the following configuration database is created in the same database when GENESIS64 is installed, the template Equipment classes will be automatically installed.
-
Assets
-
Hyper Alarm Server
-
Hyper Historian
-
Mitsubishi Electric FA
If you have already installed the “Equipment classes” template, skip this step.
1. Launch Workbench from Start > ICONICS Product Suite > Workbench.
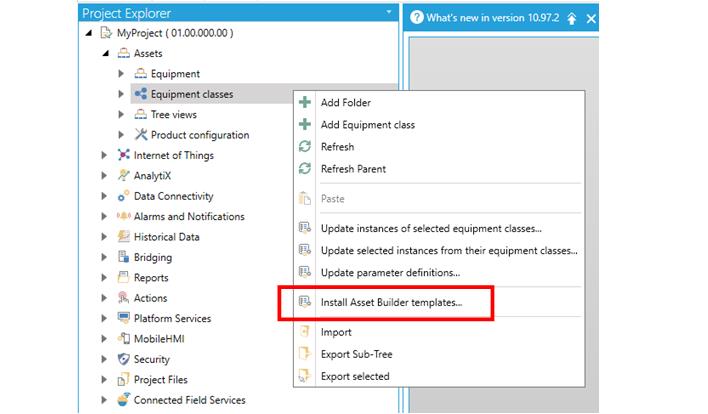
2. Right-click on “Equipment classes” in Assets and click on “Install Asset Builder templates”.
Installing Asset Builder templates in the “Equipment classes” folder
3. Click “OK” when the “Simulate operation (rollback changes before completing)” check box is OFF. If you check this item and click “OK”, you can run the installation of the “Equipment classes” template as a simulation and check whether it can be installed in the current configuration database.
The “Simulate operation (rollback changes before completing)” button
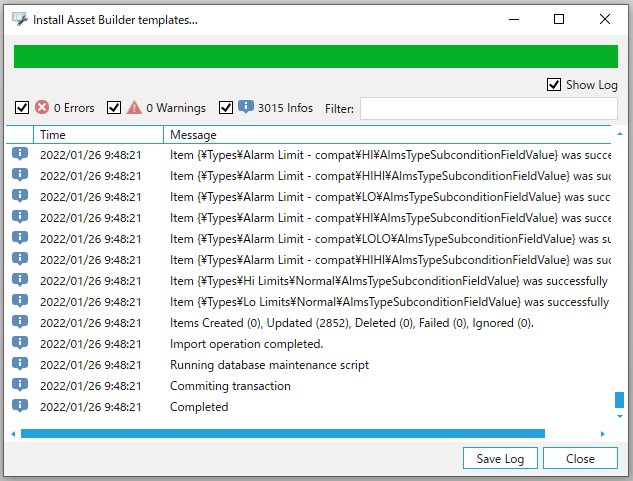
4. The “Equipment classes” template is installed.
The “Equipment classes” template installation execution window
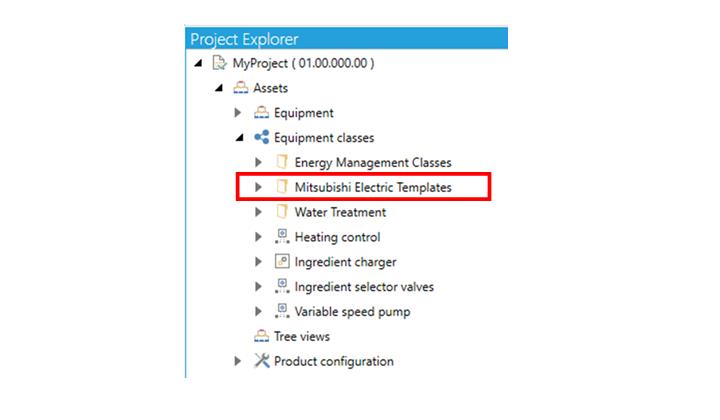
5. If the installation was successful, Mitsubishi Electric Templates appears in “Equipment classes”.
Execution result of installing the “Equipment classes” template
Launching Asset Builder
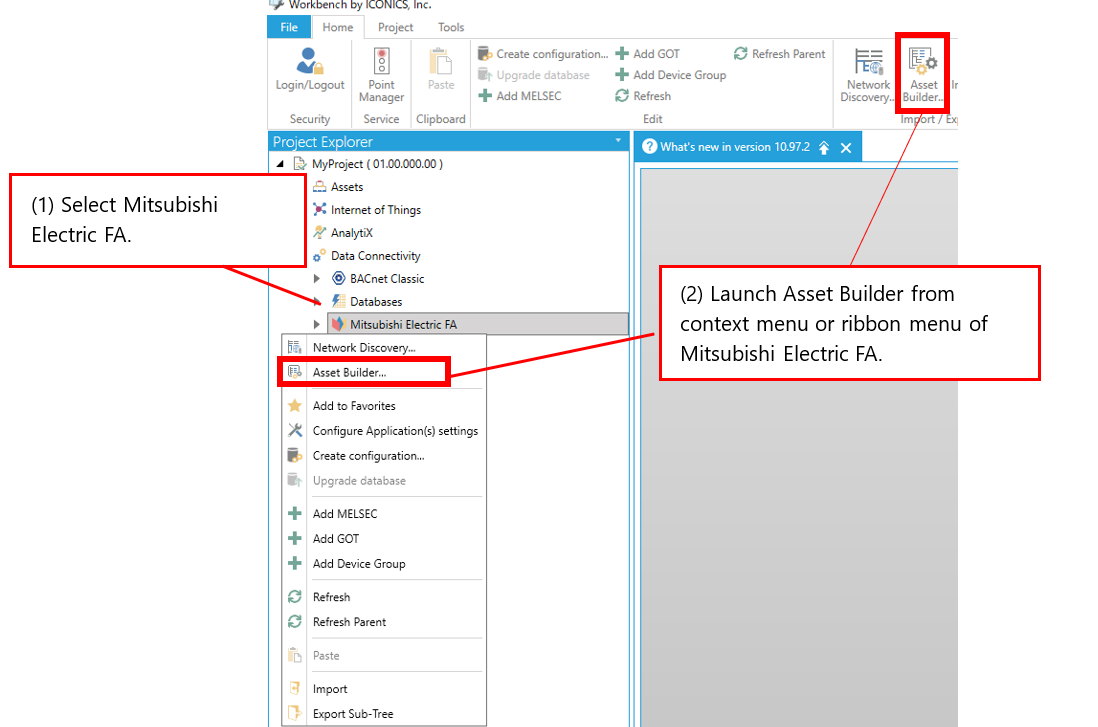
1. Launch Asset Builder from the Mitsubishi Electric FA context menu or ribbon menu.
Asset Builder Launch Menu
Setting the configuration to generate
1. Setting the configuration to generate and click "Create Instances".
Asset Builder setup window
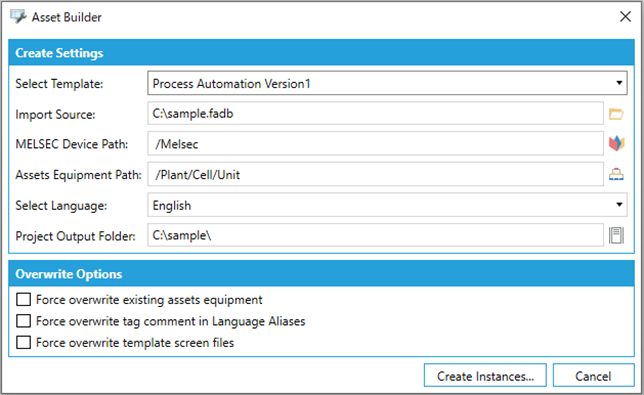
Asset Builder setup window specifications
No. | Item name | Setting contents | |
Create Settings | |||
1. | Select Template | Select “Process Automation Version1”. | |
2. | Import Source | Specify the assignment information database file (*.FADB) exported from a GX Works3 project using the FBD/LD program for process control. | |
3. | MELSEC Device Path | Enter the path to generate the device and communication tag settings for Mitsubishi Electric FA. | |
4. | Assets Equipment Path | Specify the
AssetWorX Equipment hierarchy that shall be generated. There must
be three hierarchies. | |
5. | Select Language | Specify the language (English or Japanese) of the translation generated for Language Aliasing. Specify the language of the “Process Automation” tag comment in the assignment information database file (* FADB) specified in the “Import Source”. | |
6. | Project Output Folder | Specify the folder in which the template screen files for monitoring “AssetWorX Equipment” are expanded. In addition to the screen file, a list of Process Automation tag FB to be placed in the Control Panel (FacePlateList.csv) is also generated in the same folder. | |
Overwrite Options | |||
7. | Force overwrite existing Assets Equipment | If checked: If
not checked: | |
8. | Force overwrite tag comment in Language Aliases | If checked: If
not checked: | |
9. | Force overwrite template screen files | If checked: If
not checked: | |
10. | Create Instances | Create an instance (settings and template screen) with a specified configuration. | |
11. | Cancel | Discards the settings and exit Asset Builder. | |
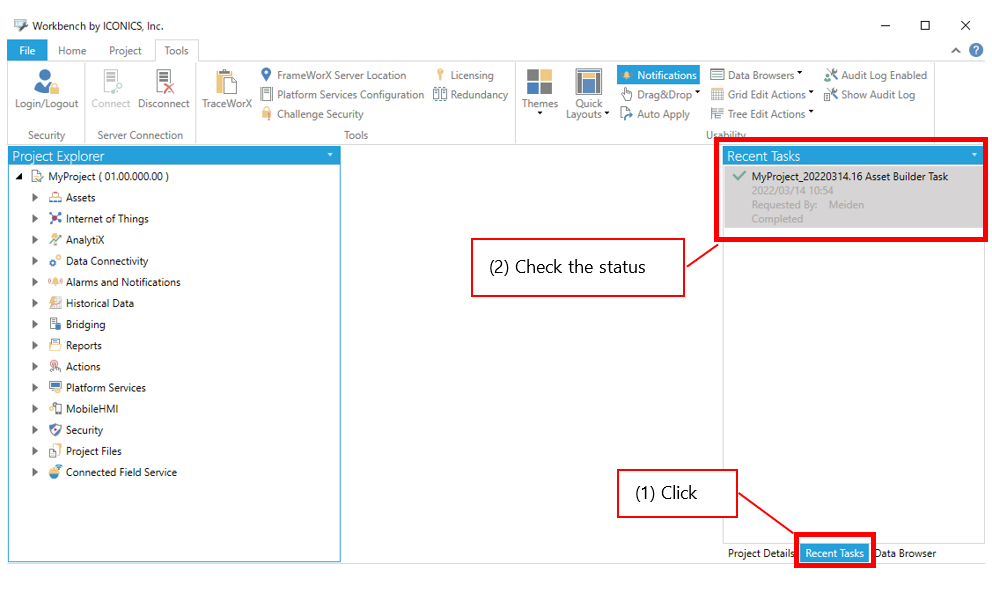
2. When the generation is finished, "Asset Builder Task" in the "Recent Tasks" will show "Completed state".
How to view Asset Builder Task on "Recent Tasks"
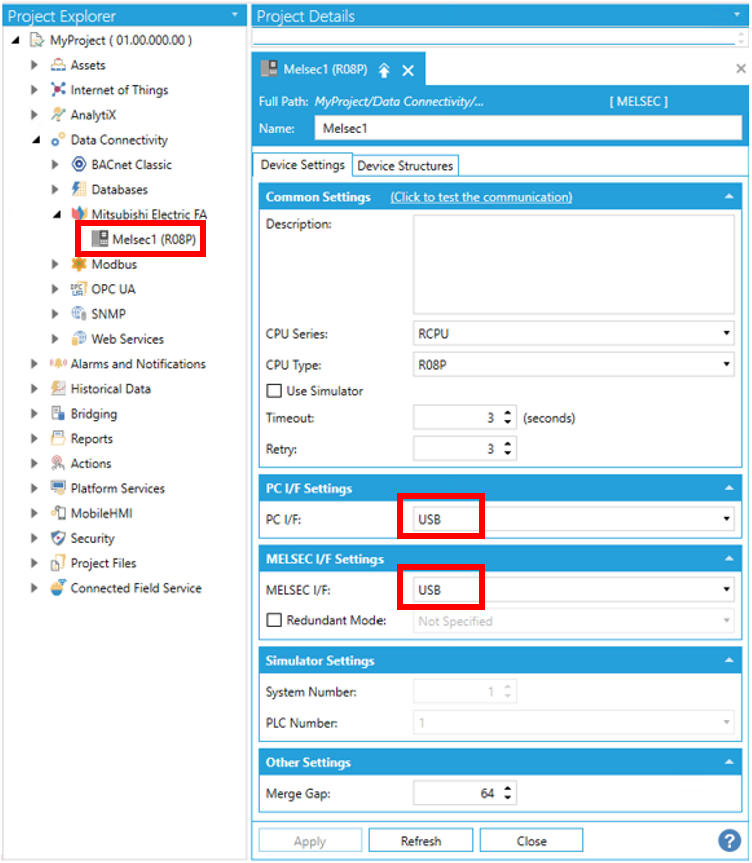
3. Edit the communication path of the "Mitsubishi Electric FA" device. When communicating with the device, edit the "PC I/F Settings", "MELSEC I/F Settings" of the Mitsubishi FA device generated to the actual communication path. Please see the Mitsubishi Electric FA help for more details.
"Mitsubishi Electric FA" device configuration
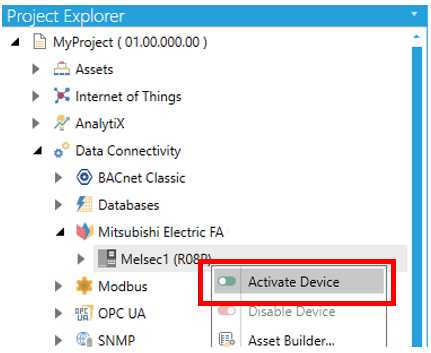
4. Right-click on the generated "Mitsubishi Electric FA" device and click on "Activate Device". This enables the "Mitsubishi Electric FA" device to communicate.
Activating of "Mitsubishi Electric FA" devices
See also: