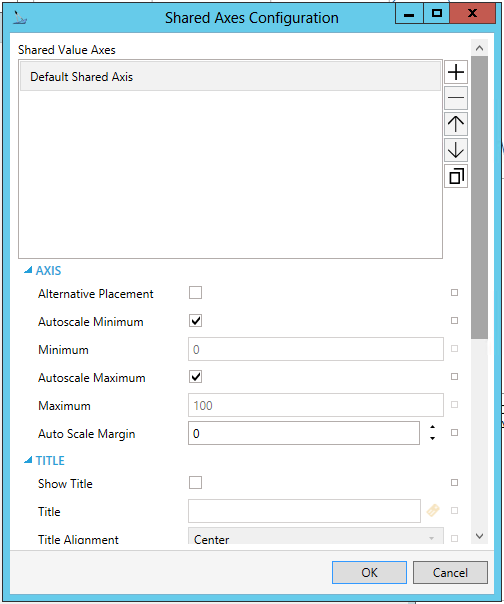
Shared Axes Configuration Window
Shared Axes Configuration Window

Shared Value Axes
Within the Shared Value
Axes section of the window, you can click on the plus sign [+]
to add an item to the list. Each new item, in addition to the Default
Shared Axis, will be shown as an additional axis (e.g. Axis1, Axis2, Axis3,
etc.). Click on the minus sign [-] to remove a listed item. Click on the
up arrow to move a selected item higher in the list. Click on the down
arrow to move a selected item lower in the list. Click on the  button to duplicate a selected
entry in the list.
For any selected Axis in this list, you can then set its properties in the remainder of the window settings (Axis, Title, Tick Marks, Style).
Axis
-
Name (except for Default Shared Axis) - Unique name used to associate pens with this axis. Enter a name in the text entry field.
-
Alternative Placement -Enable to show this axis on the other side of chart area. [Axes can appear on both sides of a TrendWorX64 Viewer. When configuring a shared axis, check the 'Alternative Placement' box to have the axis configured on the non-default side (right) of the viewer.]
-
Autoscale Minimum -Determine axis minimum automatically in runtime.
-
Minimum -Manual or variable axis minimum. Enter a minimum in the text entry field.
-
Autoscale Minimum -Determine axis maximum from data automatically in runtime.
-
Maximum -Manual or variable axis maximum. Enter a maximum in the text entry field.
-
Auto Scale Margin -Specifies a percentage of extra space added to the range when in auto scale mode.
Title
-
Show Title -Enable to show axis title.
-
Title -Axis title. Can contain aliases. Enter a title in the text entry field or click on the
 button to open the Data Browser
to navigate to your selected title.
 -
Title Alignment -Axis title alignment on axis scale. Use the pulldown menu to select from Minimum, Center, or Maximum.
Tick Marks
-
Major Ticks Count -Number of major tick marks with labels. Enter a number in the text entry field or use the up/down arrow keys.
-
Major Ticks Size -Specifies the size of major tickmarks in pixels. Enter a number in the text entry field or use the up/down arrow keys.
-
Minor Ticks Count -Number of minor tick marks between major tick marks. Minor tick marks do not have labels. Enter a number in the text entry field or use the up/down arrow keys.
-
Minor Ticks Size -Specifies the size of minor tickmarks in pxels. Enter a number in the text entry field or use the up/down arrow keys.
Style
-
Background -Specifies the background of the axis. Enter a color code in the text entry field or click on the
 button, which opens the Brush Picker
window, which allows you to select a Solid Color, Gradient, or Global
Color.
 -
Stroke -Stroke of axis tick marks. Enter a color code in the text entry field or click on the
 button, which opens the Brush Picker window, which allows
you to select a Solid Color or Global Color.
 -
Label Color -Axis labels color. Enter a color code in the text entry field or click on the
 button, which opens the
Brush Picker window, which
allows you to select a Solid Color or Global Color.
 -
Label Font Family -The font family used for the text of the labels. Use the pulldown menu to select from installed available fonts.
-
Label Font Size -The size of the font used for the text of the labels. Enter a number in the text entry field or use the up/down arrow keys.
-
Label Format -Numeric format of axis labels. Use the pulldown menu to select from C, D, E, F, G, N, P, X, 0.0, 0.00, or 0.000. You can also click the
 to open the Data Browser and navigate
to your selected label format.
Click the OK button to return to the previous configuration form.
See Also: