Layers
When you create a new GraphWorX64 display, any object that you draw or add to the work surface is placed on a primary layer of the display. You can think of that primary layer as providing the same capability as a background would in a paint program; the layer always exists — but is not shown in the object hierarchy of objects, groups, and layers that appear in the Explorer pane. As you add objects to the primary layer, those objects are drawn in an order from front to back such that the last drawn object is the top object. This allows you to work on any newly added object without interference from objects on the design surface from your previous work.
The figure below show four different objects and illustrates the concept of order in a layer. You can control the sequence of objects using the arrange commands for front and back. Note that the Layer object also shows up in the Explorer; if you only intend to use one layer, then there is no need to add a layer. Add layers only when you need more than one. (If you don't see the Explorer pane, bring it back into view by enabling the Explorer check box found in the Show/Hide tab group of the ribbon for the View menu.)
Object Order is Shown in the Explorer Pane
.")
Note that the layer has its own properties displayed in the Properties tab on the right. The Layer's properties are different than the properties of the This Display object because a display can have multiple layers. If you intend to use layers, you can set default values for layer properties on the Preferences tab. For more information, refer to New Layer Default Settings.
You can do the following things with layers:
-
Layers can be renamed in the Explorer; however, names must be unique.
-
Layers can be selected and multi-selected; when grey highlighted are active, and when blue highlighted they are selected.
-
Layers can be hidden.
-
Objects and groups can be drawn on a layer in the work area
-
Objects can be moved into a layer by dragging the object in the Explorer.
-
If you use objects' ShareKeyword property to be able to maintain uniformity among identical objects in your GraphWorX64 displays, you can use the Update Shared Objects feature to update components in all layers in a display; for more information, refer to Updating Shared Objects in Groups or Symbols.
To show/hide an object:
Enable or disable the Show object check box (the eyeball ![]() ) for the object in the Explorer pane
) for the object in the Explorer pane
To lock/unlock an object:
Enable or disable the Lock object check box (lock ![]() ) for the object in the Explorer pane. A locked object will not display selection handles when you click on it.
) for the object in the Explorer pane. A locked object will not display selection handles when you click on it.
To move an objectorder in a layer (the Z-order), do one of the following:
-
Click the icon in the Arrange tab group of the ribbon for Send Object Backwards
 , Bring Object Forward
  , Send to Back
 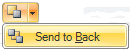 , or Bring to Front
 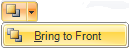 .
. -
Cut an object and paste that object to move it from any position in the Z-order to the front.
-
Click and drag the item in the Explorer pane up or down slowly; when the insertion bracket appears in the correct location release the mouse button. The figure below shows this operation.
Changing the Order of an Object in Explorer

|
|
Tip. Drag an object slowly as there is a slight delay in placement in order to allow GraphWorX64 to position the object correctly. If you want to move an object into a group, pause under the group name and wait for the group to open before you position your moving object in the group at the location desired. |
Layers are useful when you want to organize collections of objects, but still return the ability to access each object in the layer individually. In a display that shows a collection of gauges you could use layers to hide a gauge when the condition is appropriate. Layers can also be used as an organizational unit when you have a complex display with a large number of objects.
To add a layer to a display:
Click on the Home menu, then click on the Layer button in the Shapes tab group on the ribbon.
The new layer is added to the top of your drawing, no matter what the currently selected object is and numbered sequentially Layer n, where n=1, 2, 3 and so forth.
The Add Layer Button

To move a layer up or down in the Z-order:
Click and drag that layer object in the object Explorer to the new position, then release the mouse button.
-
Select the layer that will contain the sublayer, or an object contained inside that layer, then click the Add Layers button
-
Or, drag a layer in the Explorer to the position in the hierarchy that you want the sublayer to occupy.
See also: