Redundant Databases for the AlarmWorX64 Logger
With AlarmWorX64 Logger, you can specify a second, stand-by (redundant) database for logging alarm data if the database is not centralized and is not already made redundant via clusters or other means. An additional store-and-forward feature that caches data when a database becomes unavailable, and synchronizes data when the database comes back online. This ensures that the logger can always write alarm data to a database, and significantly reduces the risk that alarm events will be lost due to loss of database availability.
|
|
Note: While this approach ensures that a database is always available for the logger to write to, it does not help if the logger itself becomes unavailable. |
To set up a redundant database for the AlarmWorX64 Logger to write to, use the Redundancy subtab of the Database Logging tab on the AlarmWorX64 Logger Configuration form. Make sure to select the Enable Database Logging checkbox. For more information, see Configuring the AlarmWorX64 Logger.
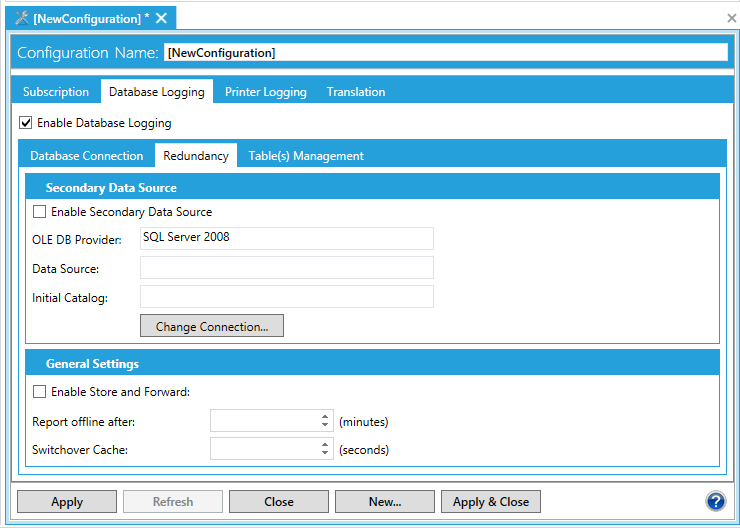
The following list describes the fields on the Redundancy subtab:
-
Enable Secondary Data Source—Select this checkbox to point to a stand-by database to serve as a redundant database if the primary database becomes unavailable. If you don't select this checkbox, no alarm events will be written by the logger if the primary data source becomes unavailable.
-
OLE DB Provider—Displays the current stand-by database that the logger will write to if the primary source becomes unavailable.
-
Data Source—Displays the current data source.
-
Initial Catalog—Displays the catalog that has been set as the default catalog.
-
Enable Store and Forward—Select this checkbox to enable the store-and-forward feature. If you are using a secondary data source for redundancy, you should use the store-and-forward feature. This feature caches data if the connection to a logger database is lost. When the connection to the logger database is restored, the cache is flushed, and the two databases (primary and secondary) are automatically synchronized.
To specify the stand-by data source:
-
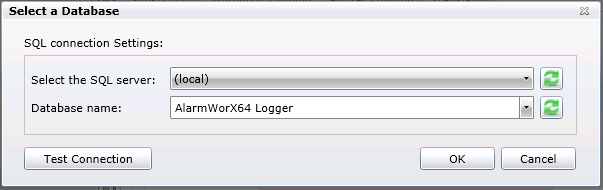
Click the Change Connection button to open the
 Select a Database dialog.
 -
Select your SQL server and database name.
-
Click Test Connection to test the connection to the database.
-
Click OK to close the dialog.
See also: