Templates in GraphWorX
GraphWorX™64 templates are a collection of design elements (formatted objects, controls, dynamics, or any other design properties) applied to any display in the configuration mode. GraphWorX64 templates change the displays' "look and feel" and allow you to standardize an organization's graphic displays. Templates allow you to apply a single template to multiple display files. Remember that when you edit or change the template, the template updates all display files with the new one. You cannot edit objects in the applied template because the background elements are frozen (have a fixed format).
You
can create templates for regular monitor displays and Windows
Phone displays. Anything you can create in a GraphWorX64
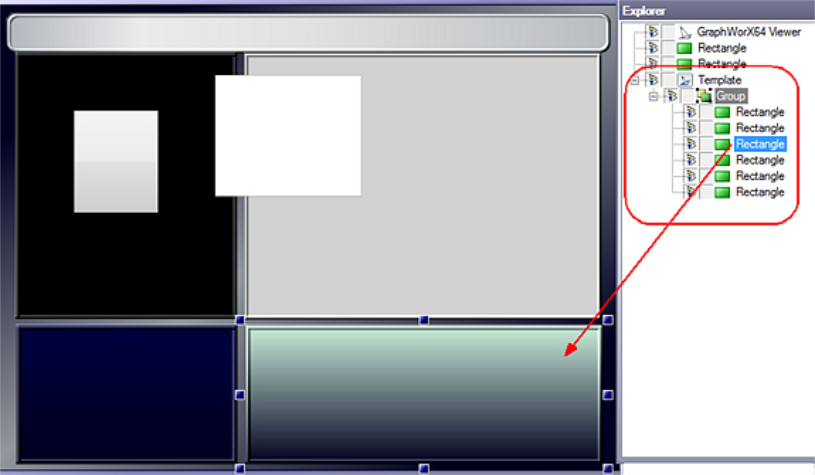
display can be saved as a template file. When applying a template, all template elements are used in a single layer behind all the objects on the display. You cannot modify template elements unless you are in the  template
group object in the Explorer pane. If the template is saved with more than one layer of objects, then the template is applied with all of those objects combined into the template layer.
template
group object in the Explorer pane. If the template is saved with more than one layer of objects, then the template is applied with all of those objects combined into the template layer.
GENESIS64™ includes predefined
templates that are stored
in the GraphWorX64 Design template gallery. When new GraphWorX64 templates become available, you can insert them into the gallery.
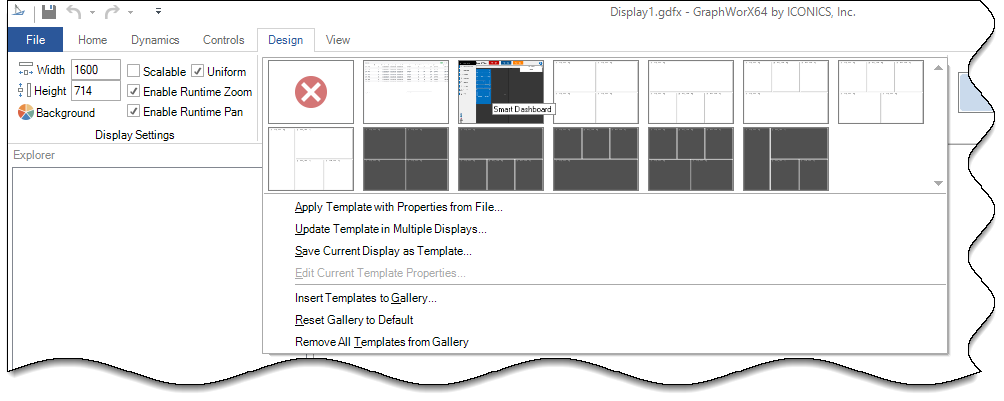
 Hold the cursor over a template
in the Design template gallery to view the file name.
If the template is open in the work area, the template's name appears in the Properties
pane.
Hold the cursor over a template
in the Design template gallery to view the file name.
If the template is open in the work area, the template's name appears in the Properties
pane.
What you can do with templates:
- Create a new template
- Inserting a template to the gallery
- Modify existing templates
- Apply a template to a display that is open on your work surface
- Limit the template properties that are applied to an open display
- Globally apply one template to a list of GraphWorX64 displays of your choosing
Create a New Template File
If
you are creating several templates, you can set your preferences
so that one specific template type is created by default. Go
to the Preferences pane, select General Settings, and specify your
preference in the DefaultNewFileType property.
To create a new template file:
- Create the GraphWorX64 display with all of the features you desire.
- Select the Save As command from the GraphWorX64 menu.
- Navigate to the Templates folder, if necessary.
- Provide a unique name for the template in the File Name text box.
- From the Save as
Type drop-down list, select the GraphWorX64 template file. Template file extensions are:
- Normal Windows templates are saved with a .tdfx file extension or .tdfxz if the file is compressed).
- Windows Phone templates are saved with a .tdfxp file extension (or .tdfxpz if the file is compressed).
Click Save. Templates are saved and are stored in the following location:
C: \Program Files\ICONICS\GENESIS64\Templates.
Inserting a Template
This procedure adds a new GraphWorX64 template in the Design template gallery.
To insert a template into the GraphWorX64 gallery:
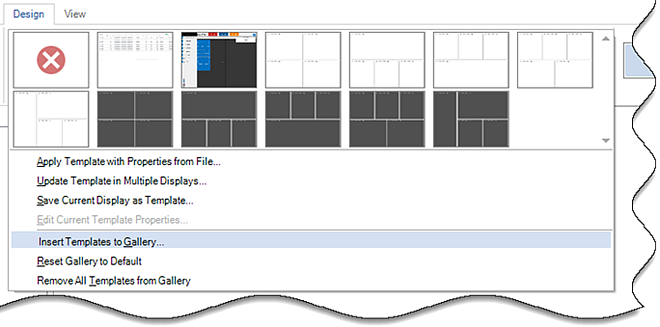
- On the GraphWorX64 Design tab, click the expand arrow
 and select Insert
Templates to Gallery from the list. View image
and select Insert
Templates to Gallery from the list. View image
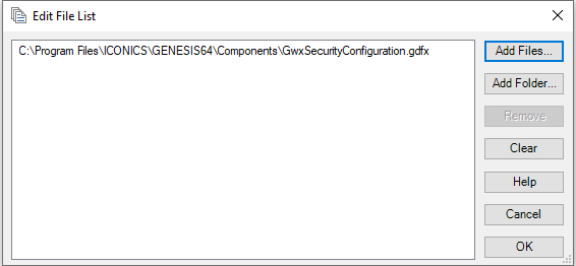
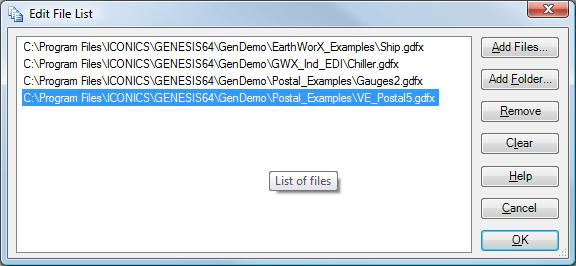
From the Edit File List dialog window, click Add Filesto browse for the .gdfx file from the stored in the following location:
C: \Program Files\ICONICS\GENESIS64\Components.
 You can select more template files if you
wish.
You can select more template files if you
wish.- Click OK to add the Design template gallery.
- Click the template image to open it in the main work area.
Modify a TemplateFile:
Select the New command from the GraphWorX64 menu to create a new work surface. This is because you cannot have a display open when you modify a template.
Select the Open command from the File menu; the Open dialog box appears. Navigate to the location of the template you want to edit.
From the drop-down list at the bottom right of the dialog box, select GraphWorX64 Templates (*.tdfx, *.tdfxz) for normal Windows templates or GraphWorX64 Windows Phone Templates (*.tdfxp, *.tdfxpz)for Windows Phone templates.
Select the template file you want; then click the Open button.
Make any changes you want to the template.
When you are done, close the template by clicking the X on its tab in GraphWorX64. A dialog box will ask if you want to save changes.
Click the Yes button. This opens the Save As dialog box.
At this point you can save the changes to a new location if you like. Otherwise, leave the file in its current location.
If you also want to rename the file, compress the file, or change its extension, from the Save as Type drop-down list, select GraphWorX64 Template (*.tdfx), Compressed GraphWorX64 Template (*.tdfxz), GraphWorX64 Windows Phone Template (*.tdfxp), or , Compressed GraphWorX64 Windows Phone Template (*.tdfxpz).
Click the Save button. The template is saved.
Apply All Template Properties to a Display that is Open on Your Work Surface:
Make sure the GraphWorX display is open on your work surface.
Click the Design tab to go to the
Design
ribbon.To view the available templates, click the
Expand button on the
Templates section's vertical scroll bar.
on the
Templates section's vertical scroll bar.Click the template you want to apply to the display.

Limit the Template Properties that are Applied to a Display that is Open on Your Work Surface:
You can limit the number of properties that are applied to a GraphWorX display that is open on your work surface.
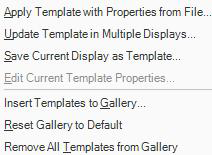
Click the
Template
menu Expand
button
and select the Apply Template with
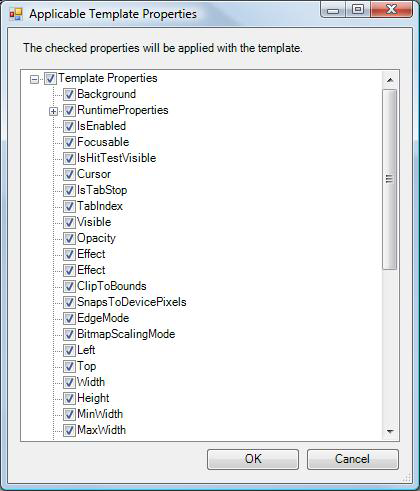
Properties from File command.In the dialog box that opens, navigate to and choose the template to be applied, then click Open. The
Applicable
Template Properties dialog appears.Deselect the properties that are not to be applied, then click OK. The selected properties will be applied.
Globally Apply One Template to a List of GraphWorX Displays of Your Choosing:
You can apply a template universally to any number of files at one time, and at the same time you can limit the template properties that are applied.
On the Design ribbon, click the
Template section'sExpand
button
and select Update
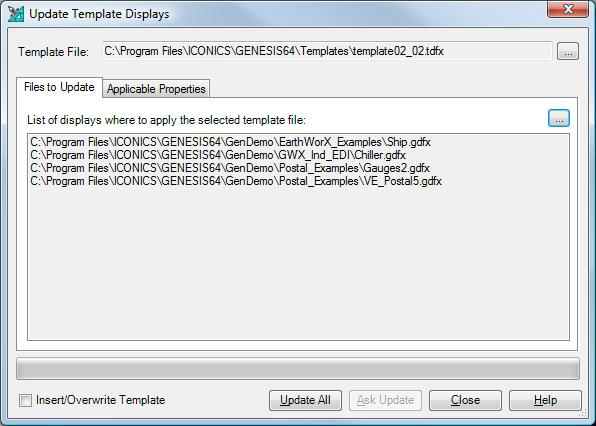
Template in Multiple Displays. The Update
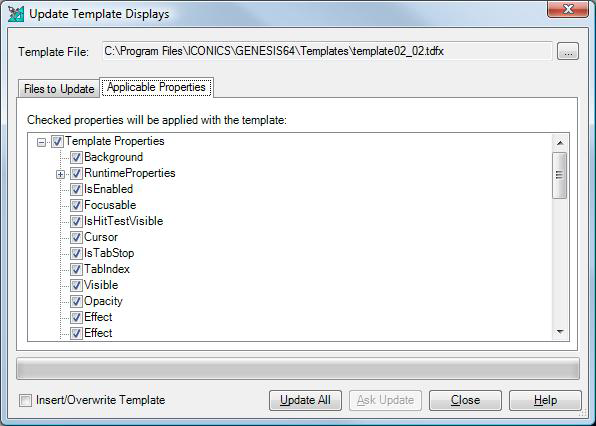
Template Displays dialog box appears; if you need help using this
dialog box, click its Help
button.In the Update Template Displays dialog box, click the Template File ellipsis button
 then navigate to and select the template file that you will be applying
to one or more GraphWorX display files. Template files are saved to
disk with a .TDFX file extension. If you
are using a predefined GraphWorX64 template, you can find it in the
Templates folder%SystemDrive%/Program Files///Templates.
then navigate to and select the template file that you will be applying
to one or more GraphWorX display files. Template files are saved to
disk with a .TDFX file extension. If you
are using a predefined GraphWorX64 template, you can find it in the
Templates folder%SystemDrive%/Program Files///Templates.On the
Files to
Update tab, click the ellipsis button
to open the Edit File List dialog box.In the
Edit File
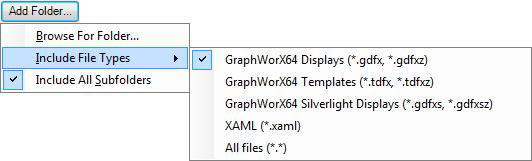
List dialog box, you can add individual files
(click the Add Files button)
or individual folders (click the Add Folder button)
of GraphWorX displays that the template will be applied to. Click
the appropriate button, then select the display file(s)
and folders. Continue to add all appropriate files and folders. To
remove a line from the list, select the line and click theRemovebutton. ClickClearto start
the list from scratch. ClickCancelto close the dialog without saving your changes.When you have created the list of files or folders, click OK. The list is added to the Update Template Displays dialog box. (To modify the list, click the ellipsis button
again
to modify the list in the Edit File List dialog box.)On the Update Template Displays dialog box, if you wish to overwrite the existing templates in all of the files and folders in the list, then select Insert/Overwrite Template check box.
All of the template's properties will be applied unless you go to the
Applicable Properties tab
and deselect the properties that you don't want to be applied.At any time you have the option to click Close, which closes the dialog and saves the list without applying the template.
When you are ready, apply the template to the files by clicking Ask Update (which prompts you for a confirmation before updating each individual file, but only if you put a check mark in the Insert/Overwrite Template check box) or Update All (which updates all of the files without prompting you).
Starter Displays
Instead of starting with a blank canvas, users can now begin designing from a number of starter displays. These displays have been designed to have a uniform look-and-feel and can make it easier for new users to get up and running.
The built-in starter displays include a powerful smart dashboard frame and several content displays that load within the frame. This display architecture provides a single place for shared content like important KPIs and navigation, making it easy to modify these elements without having to apply changes across multiple files. It has always been possible to design displays in this way, but the new starter displays make it even easier to understand and use this powerful design philosophy from the start.
Starter Display
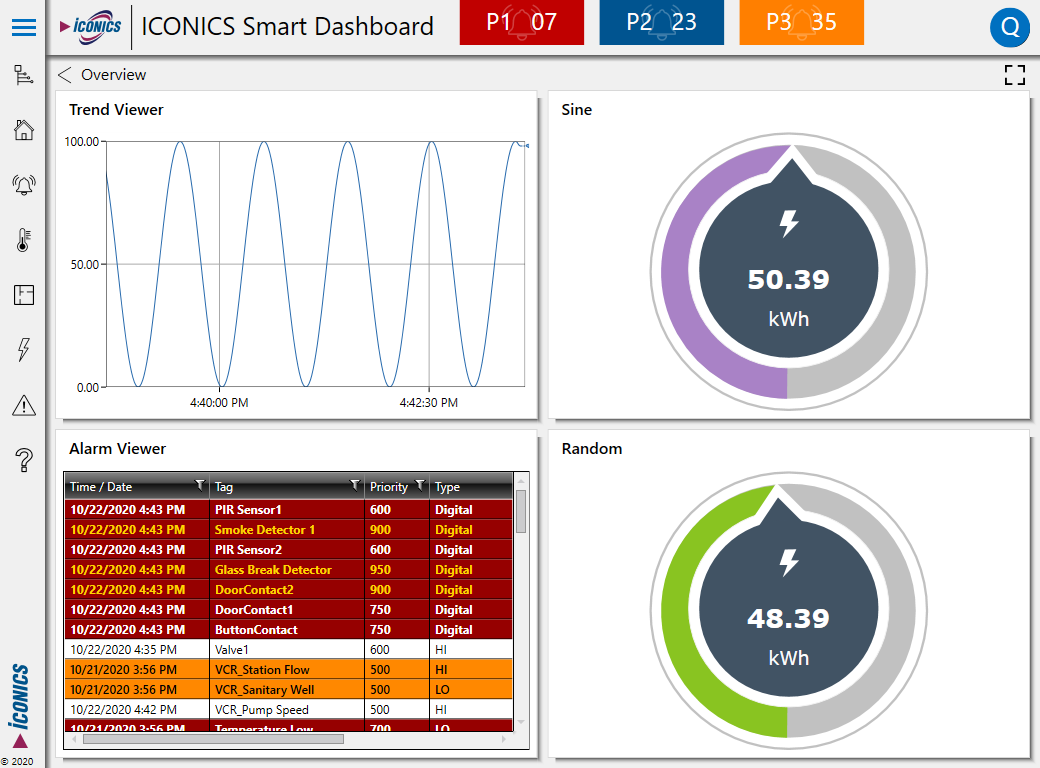
Users can also add their own starter displays, allowing systems integrators to create a uniform model for all of their projects and give their engineers a consistent starting point.
To create a new display using a starter display, open GraphWorX64, go to the Design ribbon, and select one of the displays in the Templates gallery.
See Also: