Animating an Object Over a Path
Using a location dynamic is the key to animating an object over a path of that you define. The location dynamic is easy to create and control, and it offers a great deal of flexibility. The Location Dynamic Properties topic explains how to use the location dynamic to create a slider that changes a value as it moves. In addition to creating instrumentation, a location dynamic can show:
-
An automobile moving along an assembly line
-
The location of a train in a rail system
-
Where the automated cleaning and sensing robot is located in a pipeline
-
Other applications where location or status can be represented by the progress along a path. In a 2D display, it is even possible to create locations in three dimensions using two different path assignments, one in the X-axis and the other in the Y-axis.
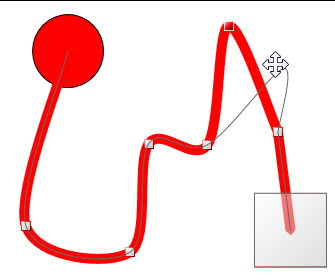
As an example of animation along a 2D path the following is done:
-
Click the
 Ellipse (Oval) button
 in the Shapes section of the 2D Home ribbon, hold the Shift key, click and drag a circle; set the fill property to red.
 -
Select the red circle, then click the
Location button , either on the Dynamics ribbon or the Dynamics tab's toolbar
 , to add a path.
 -
To create an additional node in the path double click the path and drag the
red selection handle where you want the node to appear. If you make a mistake, with the node point selected press the Delete button. -
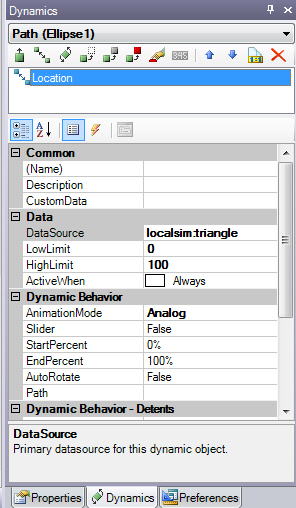
Set the
Location dynamic properties so that: DataSource is localsim:triangle; LowLimit is 0; HighLimit is 100; ActiveWhen is Always; and Animation mode is Analog. The localsim:triangle is a rampup/ -
Click the
Runtime button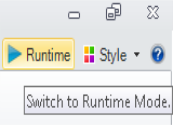 to see the animation along the path.
|
|
Tip: Alternatively, you can use a 2D pipe control to create a pipe along which the object is to move. For instructions, refer to the Pipe Control topic. |
In a 2D display, see:
Location Dynamic Properties for 2D
Creating a Slider using the Location and Size Dynamics
Using a 2D Pipe Control as the Path for a Moving Object
In a 3D viewport, see: