SQL Server Database Connection
This topic is a continuation of the process described in the Connecting to Open Databases topic. Follow these steps to establish a SQL Server database connection.
To Connect to a SQL Server Database:
-
Open the Workbench. Expand your project folder, then the Data Connectivity node, then the Databases node.
-
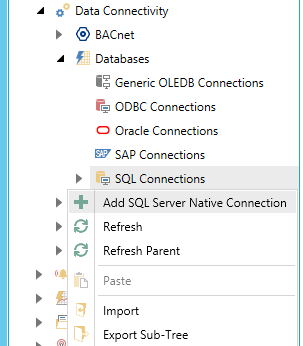
Right-click the SQL Connections node then click on Add SQL Server Native Connection, as shown below.
Add SQL Server Native Connection in Project Explorer

-OR-
Select the SQL Connections node, then click on the Add SQL Server Native Connection button, shown below, in the Edit section of the Home ribbon in Workbench.
Add SQL Server Native Connection Button

-
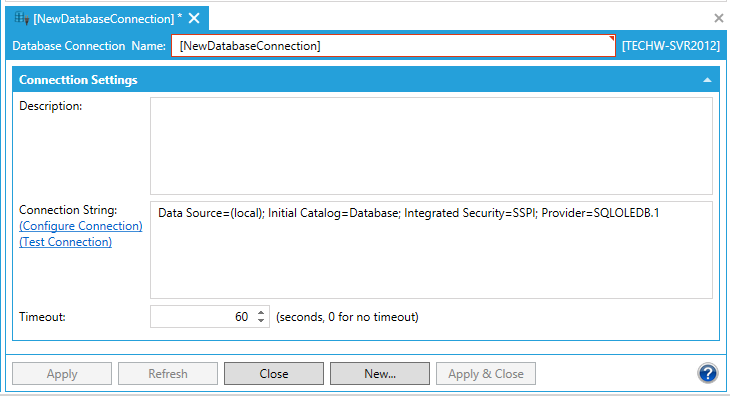
This opens the Database Connections properties, shown below, in the right side of Workbench. Enter a name for the Database Connection in the text entry field.
SQL Server Connection Properties

-
Enter a Description in the text entry field.
-
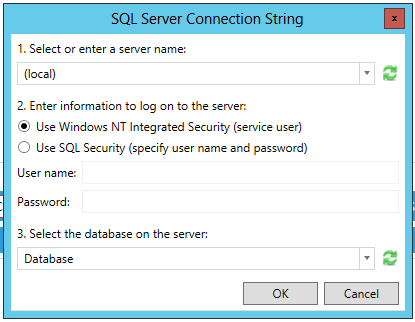
In Connection String, you can click on the Configure Connection link, which will open the Oracle Native Connection String window, similar to the one shown below. Once you have entered the requested info, click OK to return to the connection properties.
Connection String Window

-
The Test Connection link allows you to check the connection parameters for possible errors.
-
Enter a Timeout (in seconds) for the ODBC Connection in the text entry field. "0" signifies no timeout.
-
Click Apply to save your changes and Close to exit from the connection properties.
See Also: