Archives
To Add an Archive:
-
Open the Workbench and expand the Project Explorer and then the Project Files node.
-
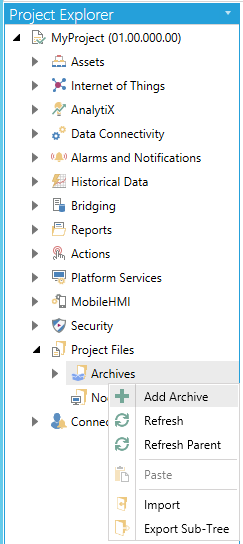
Right-click on the Archives node and select Add Archive from the pulldown menu, as shown below.
Add Archive from Project Explorer
-OR-
Select the Archives node in the Project Explorer, then click on the Add Archive button, shown below, in the Edit section of the Home ribbon in the Workbench.
Add Archive Button

-
This opens the Archive properties in the Workbench, shown below. Enter a Name for the archive in the text entry field.
Archive Properties
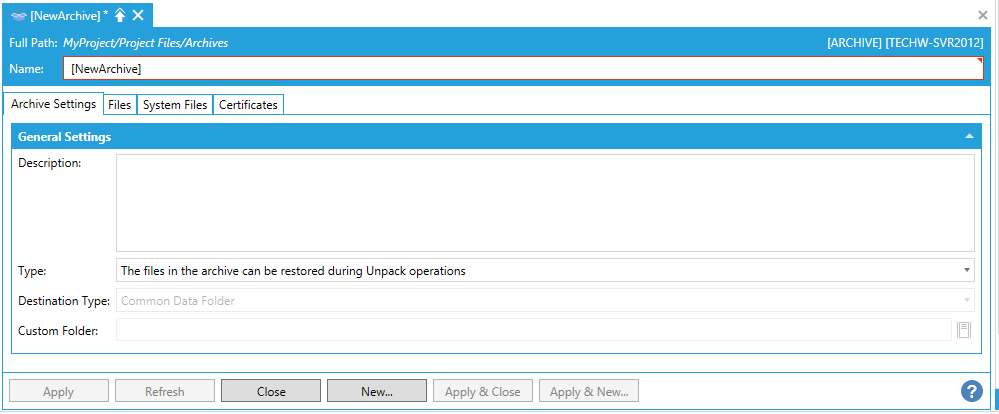
Archive Settings Tab
Archive Settings Tab
General Settings
-
Description -Enter a description for the archive in the text entry field.
-
Type -Use the pulldown menu to select from 'The archive is used as a simple backup storage'or 'The files in the archive can be restored during Unpack operations'.
-
Destination Type -If you chose 'The files in the archive can be restored during Unpack operations', you can select a Destination Type. Use the pulldown menu to select from Common Data Folder, Anyglass Folder, Binaries Folder, Common Data Folder, Published Displays Folder, or Custom Folder.
-
Custom Folder -If you selected 'Custom Folder' as the Destination Type, you can now enter the folder location in the text entry field, or you can click on the
 to open a file browser and navigate
to your selected custom folder.
to open a file browser and navigate
to your selected custom folder.
Files Tab
File Tab
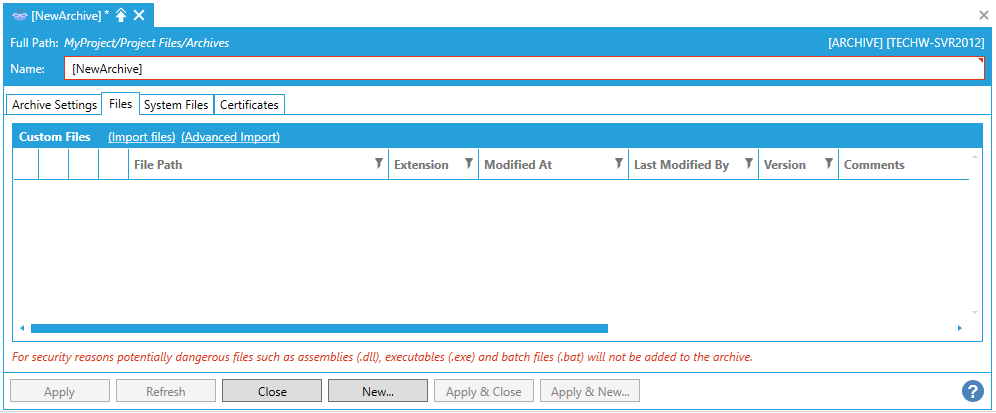
Custom Files
-
(Import files) -Clicking this link opens a file browser, allowing you to navigate to your selected files to import.
-
(Advanced Import) -Clicking this link opens the File Import Utility window, shown below.
File Import Utility
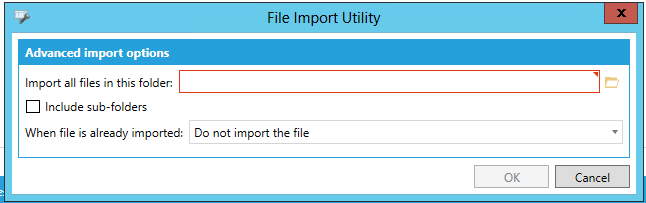
Advanced import options
-
Import all files in this folder -Enter a folder location in the text entry field or click on the
 button to open a file browser
and navigate to your selected folder that contains your selected files
to import.
button to open a file browser
and navigate to your selected folder that contains your selected files
to import. -
Include sub-folders -Click this checkbox to import any contained subfolders within your selected folder.
-
When file is already imported - Use the pulldown to select from options including 'Do not import the file', 'Overwrite the file', or 'Create a new version of the file and set it as the default'.
Once files are added, you will be able to see properties including File Path, Extension, Modified At, Last Modified By, Version, Comments, and Original File Path.
Note: For security reasons, potentially dangerous files such as assemblies (.dll), executables (.exe), and batch files (.bat) will not be added to the archive.
Dashboards and Symbols Tab
Dashboards and Symbols Tab
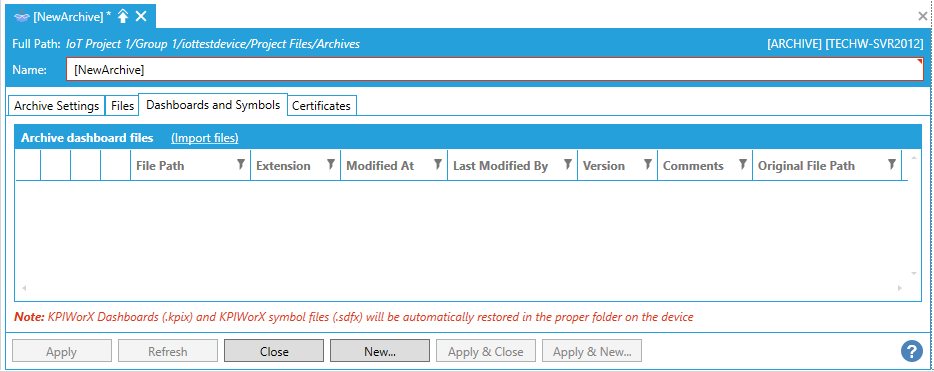
Archive dashboard files
-
(Import files) -Clicking this link opens a file browser, where you can navigate to your selected dashboard/symbol files for import.
Once dashboard and symbol files are added, you will be able to see properties including File Path, Extension, Modified At, Last Modified By, Version, Comments, and Original File Path.
Certificates Tab
Certificates Tab
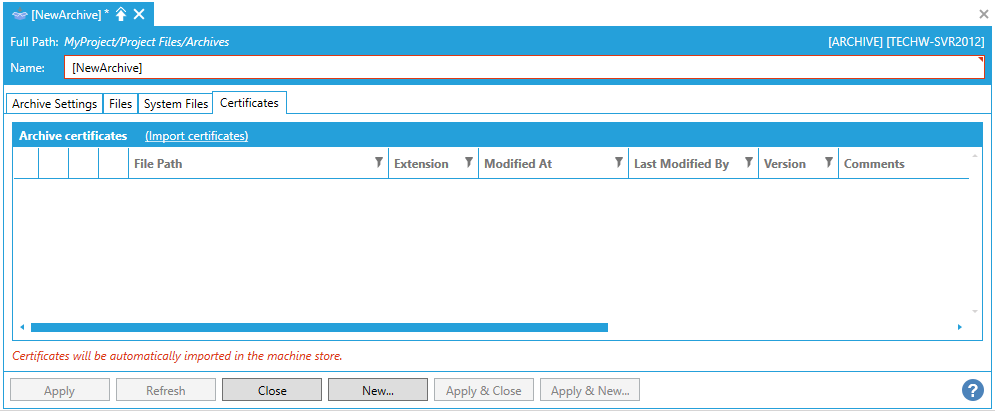
Archive certificates
-
(Import certificates) -Clicking this link opens a file browser, allowing you to navigate to your selected certificate (.der, .cer, .pem, .crt, or .key) files.
Once files are added, you will be able to see properties including File Path, Extension, Modified At, Last Modified By, Version, Comments, and Original File Path.
Note: Certificates will be automatically imported in the machine store.
-
Once you have completed your Archive settings, click on Apply then Close. Your newly created Archive (settings) will appear in the Project Explorer in the Workbench.
See Also: