Conversions
You can tell the server to convert device data value simply by setting the Conversion properties.
To Add a Conversion:
-
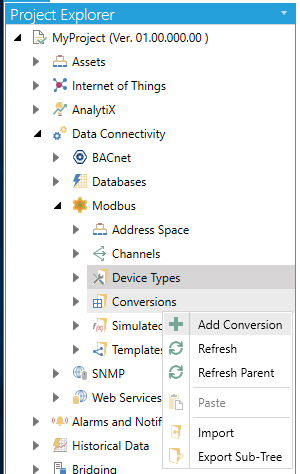
From the Project Explorer, click on Conversions, then AddConversion, as shown below.
New Conversion from the Project Explorer
-OR-
Select the Conversions node in the Project Explorer, then click on the Add Conversionbutton (see below) in the Edit section of the Home ribbon in the Workbench.
Add Conversion Button

-
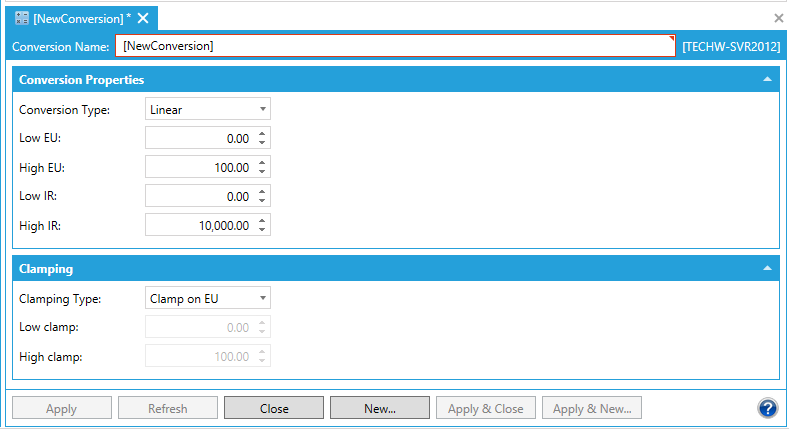
This opens New Conversion properties in the right side of the configurator, as shown below. Each Conversion has specific parameters, as shown below.
Conversion Properties
-
Conversion Name: Specifies the name of the conversion definition. The name can be up to 12 alphanumeric characters, including underscores ( _ ) and hyphens ( - ).
Conversion Properties
-
Conversion Type: For each conversion definition, select one of the following conversion types from the drop-down list:
-
None: Converts the data into float data type, but does not change the value itself. When this option is selected, the Low IR and High IR (InstrumentRange) fields are disabled.
-
Linear: Keeps a linear relation between EU (Engineering Units) and IR (Instrument Range).
-
Square Root: Keeps a square root relation between EU and IR.
-
Low EU -Client scale; Specify the low value for the engineering units (if applicable).
-
High EU-Client scale; Specify the high value for the engineering units (if applicable).
-
Low IR -Device scale; Specify the low value for the instrument range (if applicable).
-
High IR- Device scale; Specify the high value for the instrument range (if applicable).
Note: Engineering units (EU) can be specified even with no conversion.
Clamping
If clamping is enabled, the data value will be limited to its High Value/EU High Value when it exceeds the upper limit, and similarly to its Low Value/Low EU Value parameter when it exceeds the bottom limit. Select one of the following clamping types from the drop-down list:
-
Clamping Type: Use the pulldown menu to select from one of the following:
-
None: No clamping type is specified.
-
Clamp on EU: Clamps on the specified low and high engineering units (EU) values.
-
As specified: Clamps on a specified range of low and high values. This activates the nearby Clamping parameters section, described below.
-
Low clamp: Specify the low value for the clamping range.
-
High clamp: Specify the high value for the clamping range.
-
Once you have completed making your settings, click on the Apply (or Apply & Close) button to save your changes and return to the Workbench.
See Also: