SPC Distribution Rule Sets
|
|
Note: The following information is applicable only to users who have installed a Quality AnalytiX package from the AnalytiX suite. For more information about installing Quality AnalytiX, see the Installing Quality AnalytiX topic. |
In order to achieve acceptable performance levels, most systems need to produce samples whose measured properties follow specific distribution patterns and avoid potentially dangerous tendencies. A distribution rule set defines the tendencies in sample values that the process and system should or should not follow.
Quality AnalytiX comes with several distribution rule sets pre-installed. These rule sets include: Automotive Industry Action Group (AIAG), 3-sigma (Basic), Duncan, Gitlow, Hughes, Juran, Nelson, Western Electric (WECO), Western Electric Runtime (WECO Runtime), and Westgard.
Adding a Distribution Rule Set
If your company follows a different distribution rule set, you can add it to Quality AnalytiX.
To Add a New Distribution Rule Set:
-
Start the Workbench, then expand your project. Next, expand the Historical Data node to show the Hyper Historian node. Expand the Hyper Historian node to show the SPC Distribution Rules node.
-
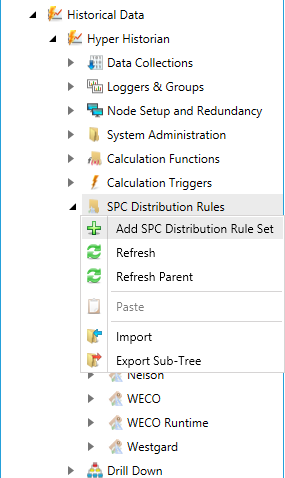
Right-click the SPC Distribution Rules node in the navigation tree, or any of its sub-nodes, and select Add SPC Distribution Rule Set, as shown in the figure below.
Add SPC Distribution Rule Set from the Project Explorer
-OR-
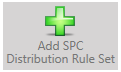
Select the SPC Distribution Rules node in the Project Explorer then click on the Add SPC Distribution Rule Set button, shown below, in the Edit section of the Home ribbon in the Workbench.
Add SPC Distribution Rule Set Button
-
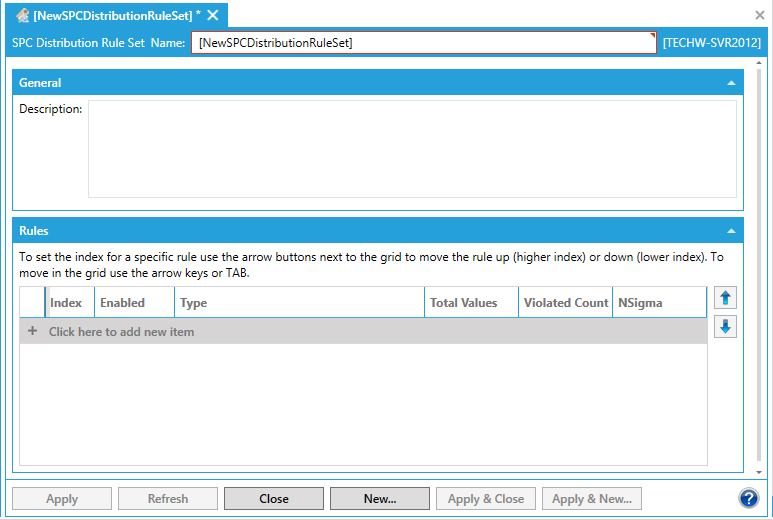
This opens the SPC Distribution Rule Set properties window, shown below, beneath the Project Details section in the Workbench. Enter a name in the SPC Distribution Rule Set Name text entry field. This name will appear in the navigation tree in the Workbench, so it's best to keep it as short as possible.
SPC Distribution Rule Set Properties
-
In the General section of the dialog, you can (optionally) add a Description that explains how this distribution rule is used.
-
In the Rules section of the dialog, click the row marked " + Click here to add new item," then click the check box in the Enabled column to add a rule. Quality AnalytiX places a number in the Index column automatically, and a cursor icon appears on the left-hand side of the row to show that you are currently editing a rule in the distribution rule set.
-
In theType column, select the type of rule you would like to add to the distribution rule set. The options include:
-
Outside Sigma Limit:An SPC tag's value deviates from its expected mean value by a number of standard deviations greater than the defined sigma limit.
-
Outside Upper Sigma Limit:An SPC tag's value is greater than its expected mean value by a number of standard deviations greater than the defined upper sigma limit.
-
Outside Lower Sigma Limit:An SPC tag's value is less than its expected mean value by a number of standard deviations greater than the defined lower sigma limit.
-
Outside Sigma Limit Single Side:An SPC tag's value deviates from its expected mean value by a number of standard deviations greater than the defined one-sided sigma limit.
-
Trending:An SPC tag's value increases for a consecutive number of samples or decreases for a consecutive number of samples.
-
Trending Up:An SPC tag's value increases for a consecutive number of samples.
-
Trending Down:An SPC tag's value decreases for a consecutive number of samples.
-
One Side of Center Line:An SPC tag's value is less than the mean for a consecutive number of samples or greater than the mean for a consecutive number of samples.
-
Above Center Line:An SPC tag's value is greater than the mean for a consecutive number of samples.
-
Below Center Line:An SPC tag's value is less than the mean for a consecutive number of samples.
-
Within Sigma Limit:An SPC tag's value remains close to the mean (each value's standard deviation is less than or equal to the defined sigma limit).
-
Alternating:An SPC tag's value is inside a sigma limit, then outside a sigma limit (or vice versa) for two consecutive samples.
-
Alternating Lower Sigma Limit:An SPC tag's value is greater than its lower sigma limit, then less than its lower sigma limit (or vice versa) for two consecutive samples.
-
-
In theTotal Valuescolumn, use the provided textbox to enter the number of samples that the SPC tag should include in an alarm sequence based on the rule specified in theTypecolumn. When an alarm is triggered, a number of values equal toTotal Valuesthat precedes the alarm trigger are included in the alarm sequence. You can also change the value in this column by selecting the up and down arrows to the right of the textbox.
-
In theViolated Countcolumn, use the provided textbox to enter the minimum number of samples that need to violate the rule specified in theTypecolumn to activate this rule and trigger an alarm. You can also change the value in this column by selecting the up and down arrows to the right of the textbox. If this rule does not need to consider violation counts, enter a value of255in this column.

Note: The following example demonstrates a use of the Total Values and Violated Count settings. If you included the Above Center Line distribution rule in your distribution rule set, with a Total Values amount of 5 and a Violated Count of 3 and attached it to the SPC tag with the following data:
Center Line: 10
Values: 8, 8, 9, 10, 11, 13, 14
...then the alarm would be triggered for the tag value of 14, and the following tag values would be added to an alarm sequence: 9, 10, 11, 13, 14.
-
Select theNSigmacolumn to edit its value. Use the provided textbox to define a sigma limit for the rule specified in theTypecolumn. You can also change the value in this column by selecting the up and down arrows to the right of the textbox. If this rule does not need to consider sigma limits, enter a value of255in this column.
-
Repeat steps 5-9 to add additional rules to your distribution rule set.
-
Select the up arrow button on the right-hand side of the dialog to move a rule one row closer to the top of the table, or select the down arrow button to move it one row closer to the bottom. Rules that appear near the top of the table receive higher priority when Quality AnalytiX applies this distribution rule set to an SPC tag.
-
When you are satisfied with the settings you have configured on this dialog, click the Apply button to save your changes, click the Apply & Close button to save your changes and close the dialog, or click the Apply & New... button to save your changes and create a new SPC distribution rule set.
You can also discard the changes you have made on this dialog since you last saved by clicking the Refresh button or retrieve the most up-to-date settings stored in the project database by clicking the Reset button. If you wish to create a new SPC distribution rule set without saving or discarding the changes to this SPC distribution rule set, click the Add New... button.
See Also: