Hyper Historian to Hyper Historian Set Up
To set up the Hyper Historian to Hyper Historian feature, you will configure both the Source Hyper Historian and the Target Hyper Historian
To Configure the Source Hyper Historian:
- Configure the Tags that you would like to log. Click Here for info on how to set up Hyper Historian Tags.
- Start Hyper Historian Logging. Click Here for info on how to set up Data Logging.
To Configure the Target Hyper Historian:
- Create a new blank Hyper Historian configuration.
- Create a new Hyper Historian Logger under Loggers & Groups > Data Logger.
- Create another Hyper Historian Logger under Loggers & Groups > Snapshot Logger.
- Create a new Hyper Historian Logging Group.
- Specify the Logger.
- Specify the Snapshot Logger.
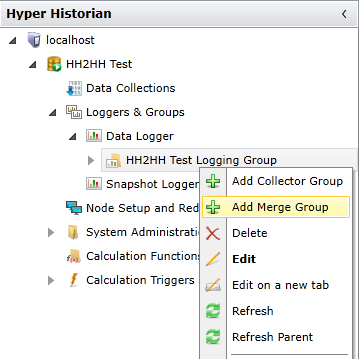
- Create a new Hyper Historian Merge Group under the Logging Group. Right-click on the Logging Group and click on
 Add Merge Group or select the logging group and click on the Add Merge Group button from the Edit section of the Home ribbon in the Workbench.

This opens a Hyper Historian Merge Group window, as shown below.
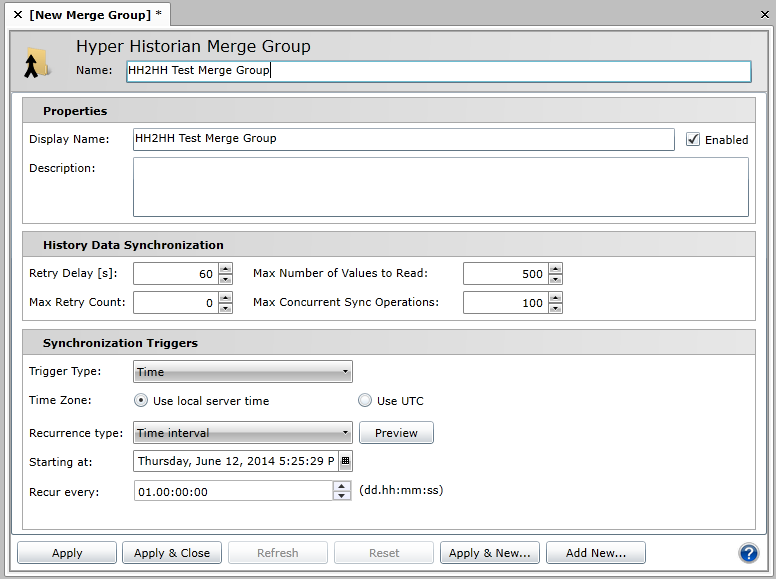
Properties
- Display Name - Enter a name for the Hyper Historian Merge Group in the text entry field..
- Enabled - Click this checkbox to enable the Merge Group.
- Description - Enter a description for the Merge Group to differentiate it from others.
History Data Synchronization
- Retry Delay [s] - Enter the amount of time (in seconds) before trying the history data synchronization again in then text entry field (or use the up/down arrows).
- Max Retry Count - Enter the maximum number of times the history data synchronization should be attempted in the text entry field (or use the up/down arrows).
- Max Number of Values to Read - Enter the maximum number of history data values to read in the text entry field (or use the up/down arrows).
- Max Concurrent Sync Operations - Enter the number of maximum concurrent synchronization operations in the text entry field (or use the up/down arrows).
Synchronization Triggers
- Trigger Type - Use the pulldown menu to select your preferred trigger type: Time, External Trigger or Data Change Trigger. The Synchronization Triggers section will change according to your selection.
Trigger Type Time
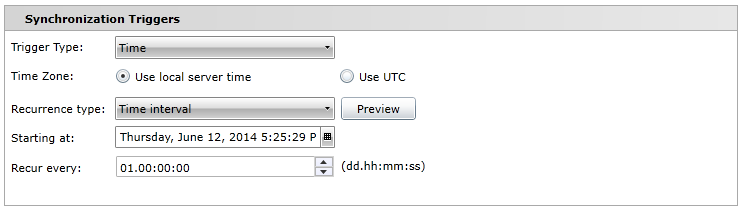
- Time Zone - You can elect to Use local server time or Use UTC.
- Recurrence type: Use the pulldown menu to select your preferred recurrsence type: One time only, Time interval or Specific dates or times. The Recurrence type section will change according to your selection.
- Trigger at - Enter the day/date/time for your One time only recurrence type or click on the calendar button
 to make your selection via the date and time tool.
 - Preview - Clicking this button opens the Recurrence preview window, as shown below.
Recurrence type One time only

Recurrence preview for the One time only Recurrence Type
Recurrence type Time interval
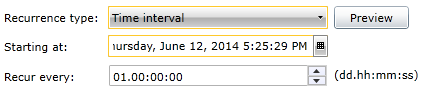
- Starting at - Enter the start day/date/time for your Time interval recurrence type or click on the calendar button to make your selection via the date and time tool.
- Recur every - Enter the recurrence in dd.hh:mm:ss format in the text entry field or use the up/down arrows.
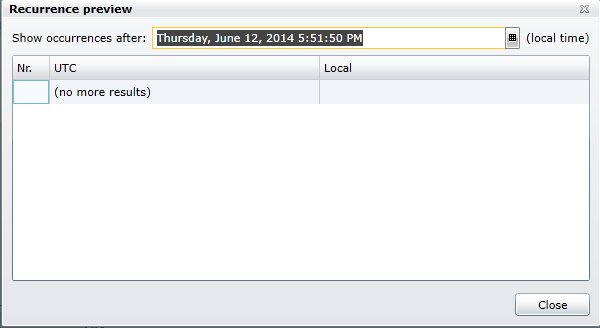
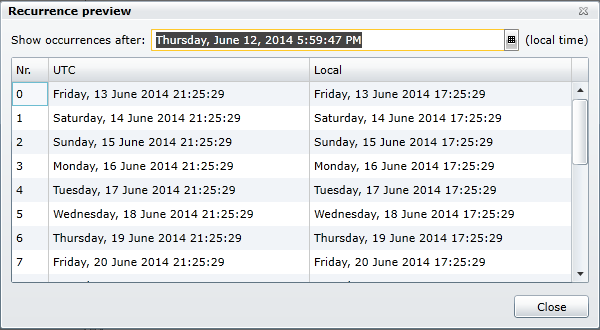
- Preview - Clicking this button opens the Recurrence preview window, as shown below.
Recurrence preview for the Time interval Recurrence Type
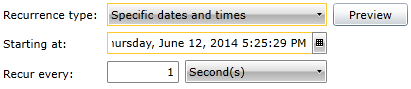
Recurrence type Specific dates and times
-
Starting at - Enter the start day/date/time for your Specific dates and times recurrence type or click on the calendar button
to make your selection via the date and time tool. -
Recur every - Enter a number of units in the text entry field and click on the pulldown menu to select from Second(s), Minute(s), Hour(s), Day(s), Week(s), Month(s), or Year(s). Dependent on the units selected, the form will update in order for you to enter specific times, specific days, etc.
-
Preview - Clicking this button opens the Recurrence preview window, as shown below.
Recurrence preview for the Time interval Recurrence Type (after selecting the third Thursday every month)

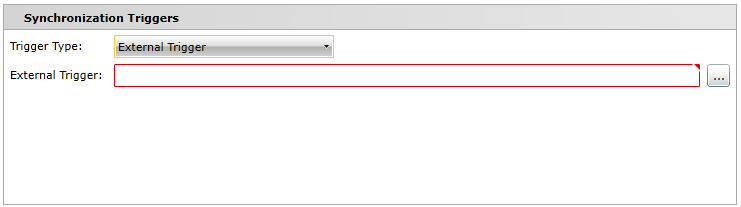
Trigger Type External Trigger
-
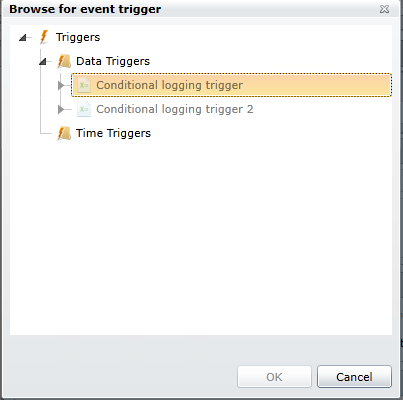
External Trigger - You can enter an external trigger in the text entry field or click on the ellipsis button [...] to open the Browse for event trigger window, as shown below. Make your selection then click OK to return back to the Hyper Historian Merge Group window.
Browse for event trigger Window
Trigger Type Data Change Trigger
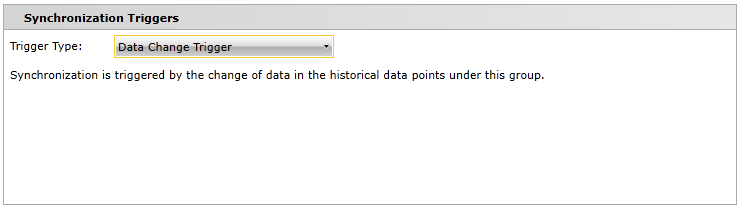
-
For the Data Change Trigger, synchronization is triggered by the change of data in the historical data points under this group.
Once you have completed making your changes to the Hyper Historian Merge Group window, click on Apply or Apply & Close to save your settings.
-
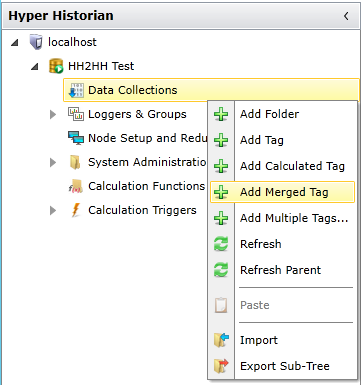
Create a new Hyper Historian merged tag by right-clicking on the Data Collections branch of the Hyper Historian tree explorer and then clicking on
Add Merged Tag or select the Data Collections branch and then click on the Add Merged Tag button from the Edit section of the Home ribbon in the Workbench.

This opens the Hyper Historian Merged Tag window, as shown below.
Hyper Historian Merged Tag Window
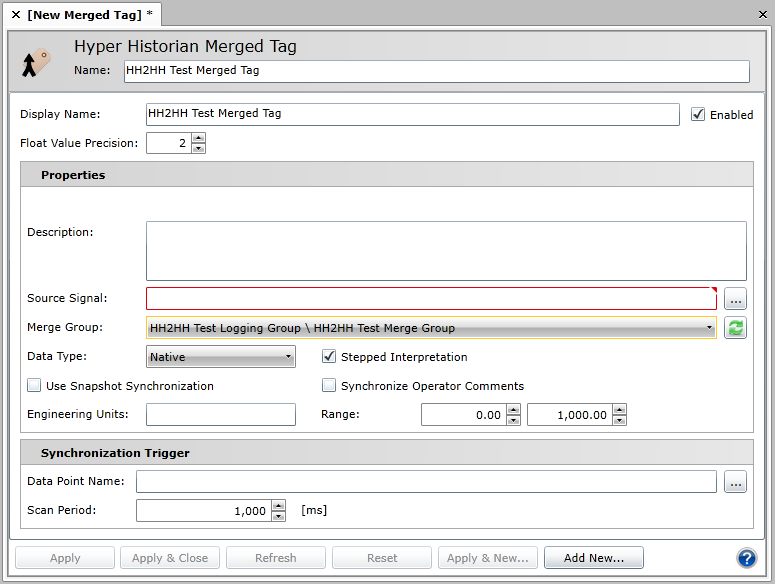
- Name - Enter a name for your Merged Tag in the text entry field.
- Display Name - Enter a display name for your Merged Tag in the text entry field
- Enabled - Click this checkbox to enable this Merged Tag.
- Float Value Precision - Enter a number in the text entry field (or use the up/down buttons) to set the precision of float values. This specifies the number of decimal places displayed in numeric controls.
Properties
- Description - Enter a description for this Merged Tag in the text entry field.
- Source Signal - Enter the location of the source historical tag in the text entry field or click on the ellipsis button [...] to open the Data Browser, allowing you to navigate to your selected historical tag.
- Merge Group - Use the pulldown menu to select your preferred Merge Group if at least one has been previously created. Click on the refresh button [
 ] to refresh the list of Merge Groups.
 - Data Type - Use the pulldown menu to select the data type of the logged value. By using the 'Native' data type, the value will be logged with the data type that the OPC server returns. Values logged as 'Native' cannot be modified via SQL OLE DB interface. Data types include Native, Boolean, Int8, UInt8, Int16, UIn16, Int32, UInt32, Int64, UInt64, Float32, Float64, String, Duration and DateTime.
- Stepped Interpretation - Check this checkbox for the nearest older available value to be used as the tag value reading at a given timestamp. Otherwise, the value will be interpreted from neighboring values. This checkbox does not appear for Boolean, String, Duration or DateTime Data Type selections.
- Use Snapshot Synchronization - Click this checkbox to enable snapshot synchronization. This feature must be enabled on the server side.
- Synchronize Operator Comments - Click this checkbox to synchronize operator comments from the source historical tag.
- Engineering Units - Enter a name, in the text entry field, of the engineering units that will be used for the current signal.
- Range - In the first text entry field, enter the tag's Low limit (or use the up/down buttons). In the second text entry field, enter the tag's High limit (or use the up/down buttons).
Synchronization Trigger
- Data Point Name - Enter a data point name of the synchronization trigger in the text entry field or click on the ellipsis button [...] to open the Data Browser to navigate to your selected data point. [Note: This step should be taken if Data Change Trigger was selected for the Merge Group.]
- Scan Period - Enter a scan period of the synchronization trigger (in milliseconds) in the text entry field (or use the up/down buttons).
Once you have completed your changes, click on Apply or Apply & Close to save your settings and return to
- Start Hyper Historian Logging. Click Here for info on how to set up Data Logging.
- Create a new TrendWorX64 Viewer display and add two pens:
- One for the Tag from the Source Hyper Historian.
- One for the Merged Tag from the Target Hyper Historian.
- Go to Runtime and compare the Source and Target Tags.
- If you change data for the Source Tag that has already been logged:
- It should be automatically forwarded to the Target Hyper Historian if Snapshot Synchronization is enabled.
- It can be manually forwarded using the Hyper Historian Synchronization Tasks Storage Management:
- Click the “+” button.
- Specify the Execution Time and Interval.
- Hit OK and Apply.
- Check in the TrendWorX64 Viewer that the change was forwarded to the Target Hyper Historian.
See Also: