Tree Views
The Tree Views feature allow users to better filter and reorganize items within tree-based navigation in ICONICS Workbench providers, such as AssetWorX. Enhanced filtering and organization within the Tree Views allows the user to better store and navigate data. Features also increase AssetWorX flexibility within Runtime mode.
A user can now create a new Tree View in configuration mode that provides filtering and organization. An example is how a user could create a new tree view in runtime mode that contains only the BACnet devices from “Building 1” and with a device name starting with “AHU” in its name. Tree Views are stored in the AssetWorX database. Another example is to use it for viewing similar types of assets across manufacturing plants.
To Create a Tree View
-
In the Workbench Project Explorer, expand your project, then the AssetWorX node.
-
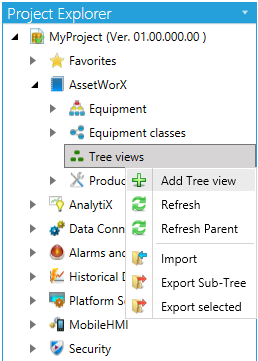
Right-click the Tree views node and select Add Tree view, as shown below.
Add Tree view from Project Explorer
-OR-
Select the Tree views node then click on the Add Tree view button, shown below, in the Edit section of the Home ribbon in the Workbench.
Add Tree view Button

-
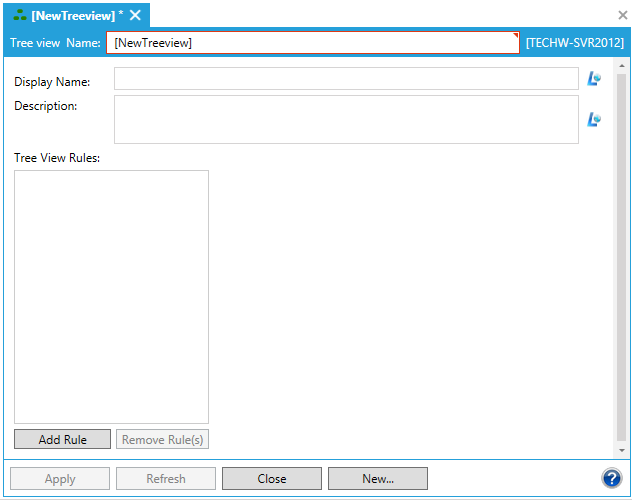
This opens the Tree view settings, as shown below. Enter a name in the Tree view Name text entry field.
Tree view Settings
-
In the Display Name text entry field, you can either enter a Display Name directly or click on the
 button to open the Data Browser to navigate Language Aliases.
 -
Similar to the step above, enter a Description in the text entry field directly or click on the
button to open the Data Browser to navigate Language Aliases.
Tree View Rules
-
Click on the Add Rule button to add a rule within this section of the window. You can also delete existing rules via the Remove Rule(s) button.
-
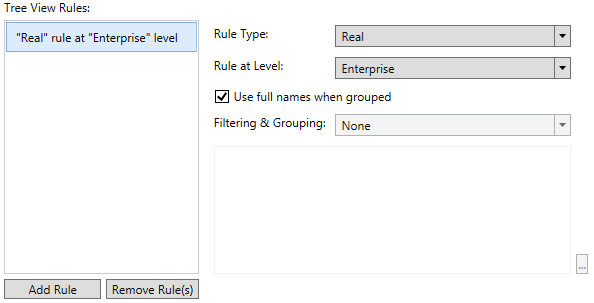
Once a rule is added, the name appears in the Tree View Rules box. If you click on any of the added rules, the remainder of the window is populated with further settings, as shown below.
Enabled Settings for a Selected Tree View Rule
-
Rule Type - Use the pulldown menu to select from either Real, Virtual or Filter rule types.
-
Rule at Level - Use the pulldown to select from Enterprise, Site, Area, Process cell, Unit, Equipment Module, or Control Module level (or from among any user-created levels) for where the rule will be applicable.
-
Use full names when grouped - Click this checkbox to ensure that full names are used in grouping.
-
Filtering & Grouping - When the 'Filter' Rule Type is selected, this pulldown is activated to select the type of filtering/grouping. The ellipsis button [...] in the bottom right of the window will also be activated, allowing you to select your desired filter. For instance, with 'Expression' selected in the pulldown menu, the ellipsis button activates the Expression Editor.
-
Once you have completed making your changes to the Tree view settings, click on the Apply button to save them and on the Close button to return to the Workbench.
See Also: