Running Hyper Historian in the Cloud
This is a simple guide on how to configure Hyper Historian (V10.85 supported) to be able to run in Microsoft Azure.
-
Install Hyper Historian on your local machine.
-
Go to the Advanced tab in Platform Services.
-
Check the “Enable Reporting to Server(s) in Azure or DMZ” checkbox.
-
Enter the Server URL in the following format: http://AZURENAME:80/BasicHttpReverse - where the SERVERNAME is the name of the Azure Virtual Machine where the Hyper Historian Collector will be running:
Enable Reporting to Server(s) in Azure or DMZ
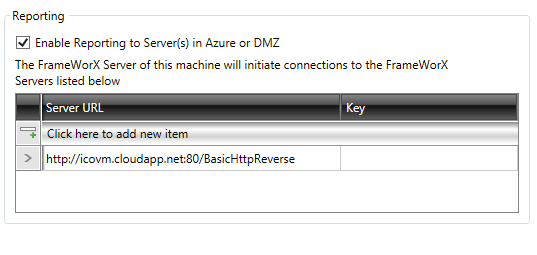
You can also use the NET.TCP protocol using this Server URL format: net.tcp://AZURESERVER:9778/NetTcp
-
Start the Hyper Historian Collector on the local machine.
-
Now, we will switch to the Azure VM. Make sure, that the Azure Portal has specified Endpoint for HTTP for port 80. More in the appendix of this document.
or to port 9778 if you are going to use the NET.TCP communication protocol
-
Install Hyper Historian on the Azure VM
-
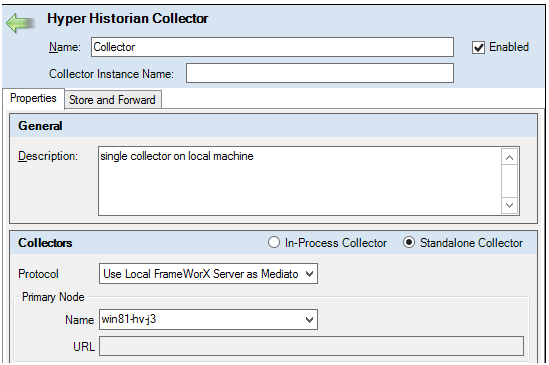
Open Hyper Historian configurator and configure the Hyper Historian Collector to be Standalone.
-
Set the Protocol to 'Use Local FrameWorX Server as Mediator'.
-
Set the Name of the computer where the Hyper Historian Collector is/will be running and apply the changes.
Setting the Computer Name Where the Hyper Historian Collector Will Run
-
You can also configure the Compression of the Data or Configuration and it is also recommended to Use configuration cache.
Also you can also enter the Secondary Node Name for the HH Collector redundancy, but don’t forget to configure the FwxServer in Platform Servers of the Secondary HH Collector as it is described in points 2) to 5) of this document
-
Configure the rest of the Hyper Historian (Loggers, Logging Groups, Collector Groups, and also Tags).
-
Once complete, start the Hyper Historian Logger on the Azure VM.
-
To check if the data is logged, you can create a TrendWorX64 Viewer display and browse for the Hyper Historian Tag in the Historical Data folder on the Azure VM in the standard way.
-
You can also display data on your local machine.
-
Go to FrameWorX Platform Services under BackEnd Servers in the FrameWorX Server configuration.
-
Add a new Server Name with an appropriate Primary Machine Name in the following format: http://AZURESERVER:80/fwxserver
FrameWorX Server Platform Services

You can also use the OPC.TCP communication protocol by using this URL: opc.tcp://AZURESERVER.net:5011/IcoFwxServer, but don’t forget to add the appropriate port to the Endpoint on the Azure Portal.
-
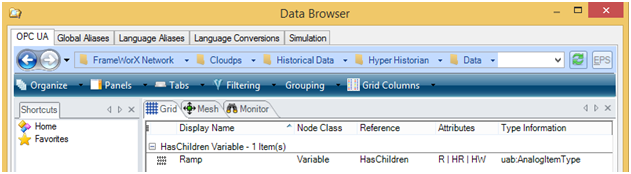
Create a TrendWorX64 Viewer display. Add a Pen and browse to the FrameWorX Network to select your specified ServerName, Historical Data, Hyper Historian and the Hyper Historian Tag.
Data Browser
-
Go to Runtime and you can now use your configured data.
Appendix: Configuring Endpoints on Azure Portal
-
Go to https://manage.windowsazure.com and log in.
-
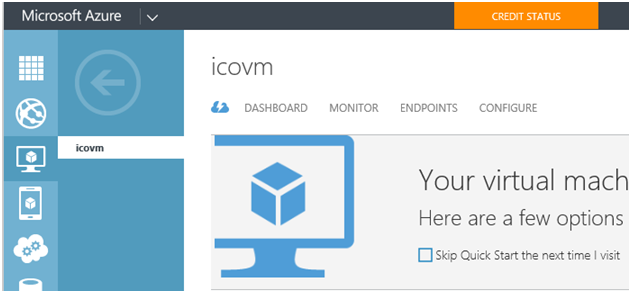
Select Virtual Machines in the left menu.
Microsoft Azure Settings

-
Click on your Virtual Machine.
Selecting Your Virtual Machine on Azure
-
Click on Endpoints.
-
Click on the ADD button at the bottom of the page.
-
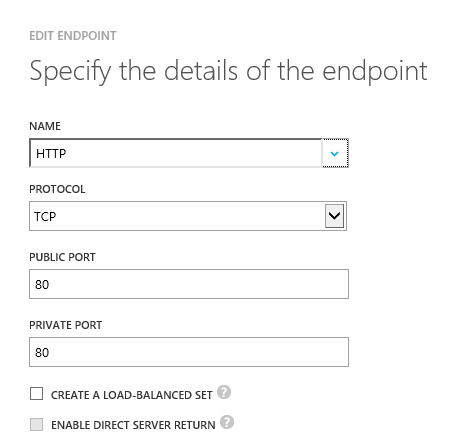
Configure your Endpoint and click on the Confirmation button.
Configuring Endpoint Details
-
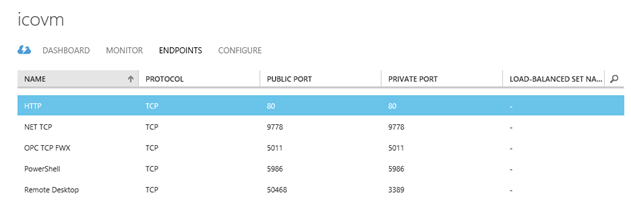
Once confirmed, the list of Endpoints will update. You can also edit these later on.
List of Endpoints
See Also: