Creating Gapless Symbols
How to Create Seamless Snap-Together Symbols
"Gapless" or seamless symbols can pose a challenge for many users. Even with perfectly aligned symbols, gaps can appear at non-100% zoom levels. This happens due to sub-pixel antialiasing. When the edge of an object does not scale exactly to a pixel boundary, its edge is blurred, making it semi-transparent and allowing the background to bleed through. This ends up breaking the illusion of a single continuous image. This can happen not only within Windows Presentation Foundation (WPF) solutions, but also in those using HTML5 as well.
Gaps and Seamless Examples

In order to eliminate gaps, the symbols should slightly overlap. This can be achieved via custom snap points that can be placed slightly "inside" the symbols, as shown below.
Example of Symbol Overlap

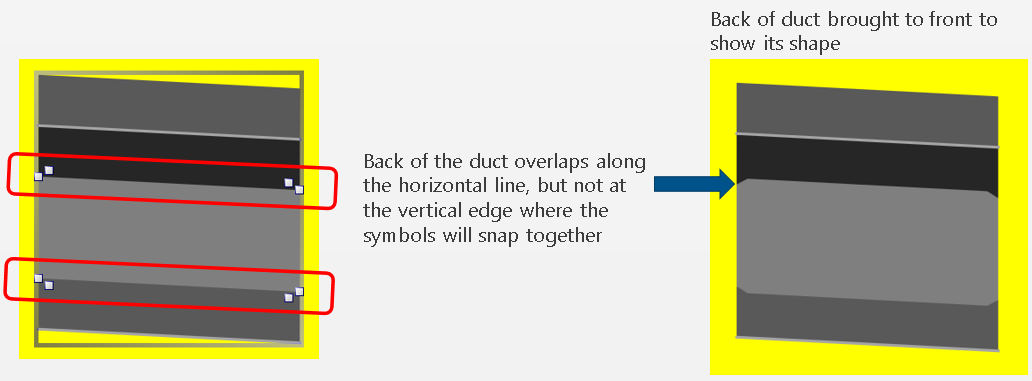
However, even within individual symbols, gaps can be a problem (also due to sub-pixel antialiasing, explained at the top of this topic). In order to rectify this, some overlapping of objects may be required within a symbol itself. Still, overlapped objects inside a symbol can actually cause gaps for snapped-together symbols even when the snapped symbols themselves are overlapped, as shown below.
Example of Visible Gap Line in Overlapping Symbols

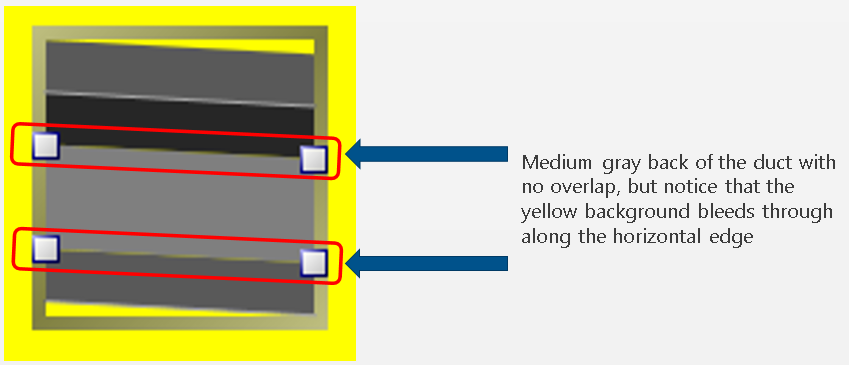
In addition, not overlapping the back of a symbol can also be a problem, as it can let the background of a display bleed through, as shown below.
Example of Display Background Bleed Through Within Non-Overlapped Symbols

The solution includes very careful overlapping, as shown below.
Example of Performing Careful Overlapping

Using the overlapping techniques explained above, users can ensure that there are no visible gaps between symbols, even at various zoom levels.
Ensuring No Visible Gaps

Key Considerations in Creating Gapless Symbols
-
Objects should be overlapped just enough, in the right places, in order to prevent gaps but not simultaneously causing other visual artifacts.
-
During the creation of new symbols, users should check frequently for gaps/artifacts by zooming both out and in.
-
-
Users should use the mouse-wheel for zooming to quickly check multiple zoom values.
-
Note that gaps are more likely to occur when zooming out to less than 100% by gaps can also occur when zooming in to greater than 100%.
-
Users should also occasionally check for gaps in symbols used within AnyGlass displays. However, it is most likely that if the symbols used in Windows Presentation Foundation (WPF) displays are okay, that they will also be okay within AnyGlass displays.
-
Sometimes "Gapless" is Not Really Needed
For "textured" symbols, gaps might not even be noticeable. (Note that textured "isometric" symbols can be created by skewing images). There are gaps in the duct image below, but the gaps are not apparent because of the texturing and the intentional sheet-metal seam where the gaps may happen.
Textured Symbol Where Gaps Are Not Immediately Seen

See Also: